Overhead Door Cable Drum Stability Case Study
Reference Standard: Relevant material and performance testing standards for industrial door hardware inspection, dimensional verification, load consistency evaluation, and operational cycle assessment.
Short Answer
An overhead door cable drum is not only a lifting component. Its long-term value comes from maintaining repeatable cable tracking, balanced load transfer, and consistent shaft synchronization throughout thousands of operating cycles.
In real installations, many lifting irregularities emerge after commissioning rather than during initial setup. Careful observation of operational behavior, groove condition, and drum pairing consistency often reveals problems before major system disruption occurs.
From First Lift to Repeated Cycles: What a Cable Drum Must Keep Stable After Installation
Many discussions about garage door cable drums stop at model selection. Real-world performance begins after the first operating cycle.
The cataloged cable drum range covers doors from approximately 96 inches to 400 inches, door weights from 240 kg to 750 kg, cable capacities from 1/8 inch to 1/4 inch, and a common 1-inch shaft interface. These values define operating boundaries, but they do not automatically guarantee stable performance over time.
A newly installed system often feels smooth because cable surfaces, drum grooves, shaft interfaces, and spring forces have not yet experienced repeated loading. During the first several hundred cycles, the system enters a mechanical adaptation phase. Small deviations in cable winding behavior can gradually accumulate.
A useful engineering observation is that stability is not measured by one successful lift. Stability is measured by whether the cable returns to the same winding path after hundreds or thousands of repetitions.
Consider two systems operating within identical door-weight ranges.
System A maintains uniform cable layering throughout repeated cycles.
System B develops slight lateral cable migration during operation.
At the beginning, both systems appear normal. After extended use, System B experiences increased side loading, uneven cable contact pressure, and localized friction concentration.
This distinction illustrates why lifecycle behavior matters more than initial movement.
Extreme Scenario Model:
A commercial overhead door operating 20 cycles per day reaches more than 7,000 cycles annually. Even minor differences in cable tracking consistency can become measurable through progressive friction accumulation, edge polishing, and cable path deviation.
Cross-Dimensional Comparison:
- Stable cycle behavior focuses on repeatability.
- Initial installation success focuses on immediate function.
The two are not equivalent engineering outcomes.
When the Door Feels Uneven: Reading Load Drift Without Rewriting the Drum Selection Table
Operators often describe a system issue using subjective language.
“The door feels heavier.”
“One side seems slower.”
“The bottom edge does not look level.”
These observations are frequently linked to load drift rather than outright component failure.
Load drift occurs when the left and right lifting paths no longer share load equally. The phenomenon can appear even when the cable drum remains within its published operating range.
The catalog confirms a common 1-inch shaft interface across multiple drum configurations. Because both drums rely on synchronized shaft rotation, small deviations elsewhere in the lifting system can gradually influence load distribution.
Mechanical Root Mechanism:
- Cable tension is transferred into drum rotation.
- Drum rotation is transferred into shaft movement.
- Shaft movement is transferred into door travel.
Any inconsistency within this chain may appear as lifting asymmetry.
Extreme Fatigue Timeline Model:
Early Stage
The door operates normally. Minor tension differences remain visually undetectable.
Middle Stage
Operators begin noticing slight unevenness near full opening or full closing positions.
Advanced Stage
Cable path consistency deteriorates. One side may carry a disproportionate share of the operational load, increasing localized stress concentration.
Cross-System Comparison:
A 240 kg door and a 750 kg door may both use properly matched drum systems, yet the heavier system typically experiences higher cumulative force transfer per cycle. This increases sensitivity to synchronization errors.
The critical lesson is that operational imbalance should be investigated as a dynamic behavior issue rather than automatically treated as a purchasing or sizing mistake.
KEY TAKEAWAYS
- Uneven door travel often appears before visible component damage.
- Small synchronization deviations can accumulate across thousands of cycles.
- Repeated cable path migration is frequently an earlier warning sign than complete operational failure.
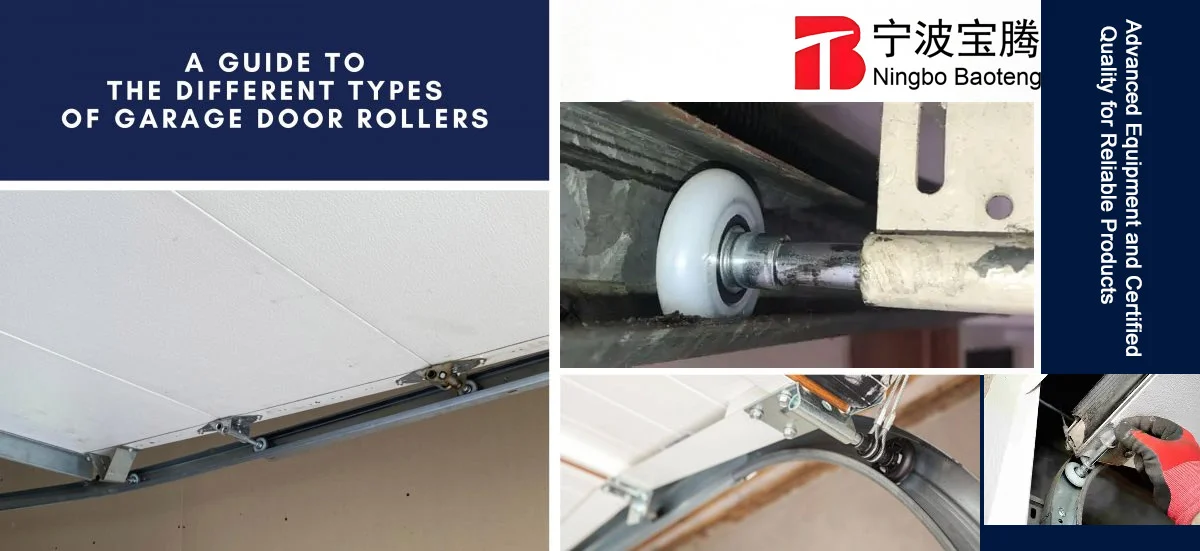
The Groove Surface After Use: Cable Imprint, Edge Polishing, and Early Wear Signals
One of the most overlooked inspection opportunities is surface observation.
The catalog provides dimensional and operational ranges, but it does not specify drum material. Because material information is not published, no article should claim aluminum, cast iron, galvanized steel, or any other construction material without verification.
Even without material disclosure, visible surface behavior still provides valuable information.
Cable contact creates a mechanical interaction zone inside the groove profile.
As operational cycles increase, inspectors may observe:
- Cable imprint traces
- Edge polishing
- Surface rubbing marks
- Localized brightening
- Groove edge roughness
- Debris accumulation
These indicators should be interpreted as evidence rather than conclusions.
Mechanism Breakdown:
A cable diameter range from 1/8 inch to 1/4 inch changes the contact geometry between cable and groove. Larger cable diameters generally distribute force differently than smaller diameters.
Likewise, a system carrying 750 kg transfers significantly greater operational loading than a system carrying 240 kg.
The combination of cable diameter and transferred load influences contact pressure development.
Extreme Pressure Timeline Model:
Initial Period
Surface interaction remains relatively uniform.
Intermediate Period
Localized polishing begins appearing in frequently loaded contact zones.
Extended Service Period
Contact traces become more visible. Groove observation becomes increasingly valuable for maintenance planning.
Cross-Dimensional Test Example:
Two installations may share identical cable diameters.
One installation operates five times daily.
Another operates fifty times daily.
The operational frequency difference creates dramatically different wear exposure despite similar hardware dimensions.
Factory-Side Pairing Discipline: Preventing Left-Right Drift Before the Carton Leaves
Many operational problems originate long before installation.
They begin during manufacturing, verification, packaging, and pairing.
A cable drum is rarely used alone. It functions as part of a coordinated lifting system.
For this reason, pairing discipline becomes a critical quality objective.
A factory-oriented verification process should include:
- Model confirmation
- Dimensional verification
- Shaft interface inspection
- Groove cleanliness evaluation
- Pair consistency review
- Surface defect screening
- Packaging protection assessment
Execution Protocol 1: Pair Consistency Verification
Before packaging, left and right drum assemblies should be reviewed together. Dimensional consistency reduces the probability of asymmetric operational behavior after installation.
Expected Evolution:
Improved consistency increases repeatability during early operating cycles and reduces the likelihood of unintended drift variables entering the system.
Hidden Cost Avoidance:
Additional inspection time is required, but corrective action after field installation is typically far more expensive.
Execution Protocol 2: Shaft Interface Validation
The catalog identifies a 1-inch shaft interface. Interface verification helps ensure compatibility throughout the lifting system.
Expected Evolution:
Improved fit consistency reduces unnecessary movement between rotating components.
Hidden Cost Avoidance:
Dimensional verification prevents installation delays caused by interface mismatch.
Execution Protocol 3: Groove Condition Inspection
Groove cleanliness and edge quality influence cable interaction.
Expected Evolution:
Cleaner groove surfaces support more predictable cable tracking behavior.
Hidden Cost Avoidance:
Removing debris before shipment reduces the risk of avoidable surface interaction problems during commissioning.
Execution Protocol 4: Packaging Separation Control
Mechanical contact during transportation may create cosmetic or functional concerns.
Expected Evolution:
Better packaging separation helps preserve delivered condition.
Hidden Cost Avoidance:
Reduced handling damage lowers replacement and complaint risk.
| Operating Variable | Typical Observation | Industry Tolerance Logic | Verification Method |
|---|---|---|---|
| Shaft Interface | Consistent fit | Match specified shaft size | Dimensional inspection |
| Groove Condition | Clean surface | No major obstruction | Visual examination |
| Cable Contact Area | Uniform tracking | Stable winding path | Operational observation |
| Pair Consistency | Similar geometry | Matched left-right behavior | Comparative measurement |
| Surface Condition | No major defects | Acceptable appearance | Final inspection |
| Packaging Protection | Controlled separation | Reduced transport contact | Packaging audit |
PRO-TIP / CHECKLIST
- Verify shaft interface dimensions before shipment.
- Confirm left and right drum pairing consistency.
- Inspect groove areas for debris or edge irregularities.
- Review identification markings for model accuracy.
- Check packaging separation between metal components.
- Conduct final visual inspection before carton sealing.
- Validate operational documentation against physical product.
- Record inspection results for traceability.
Preguntas más frecuentes (FAQ)
How to set a Chamberlain garage door opener?
Follow the manufacturer’s programming procedure and safety instructions. Opener setup should only begin after the door system operates smoothly by hand. An opener cannot compensate for underlying lifting imbalance.
How to set a Chamberlain garage door remote?
Programming typically requires access to the opener’s learn function. Always confirm remote compatibility with the opener model before attempting synchronization.
How much does it cost for a garage door?
Cost varies significantly based on door size, lifting system design, insulation requirements, operating frequency expectations, and installation complexity. Hardware selection is only one part of the overall project cost.