
Top Roller Bracket Garage Door Specification Guide
Patrón de referencia: Relevant material and corrosion performance testing standards, including ISO 9227 salt spray testing for corrosion exposure evaluation when requested by the buyer.
Respuesta breve
A top bracket is a small part, but it sits at a critical control point: the upper edge of the door panel where the roller must enter and follow the track without forcing the panel, twisting the fasteners, or scraping the bracket surface. When a door begins to run louder, rub near the top track, or show repeated screw-hole adjustments, the bracket may be involved, but it is not always the only cause. The stronger approach is to read the installation clues first, then match the bracket specification to the actual door duty.
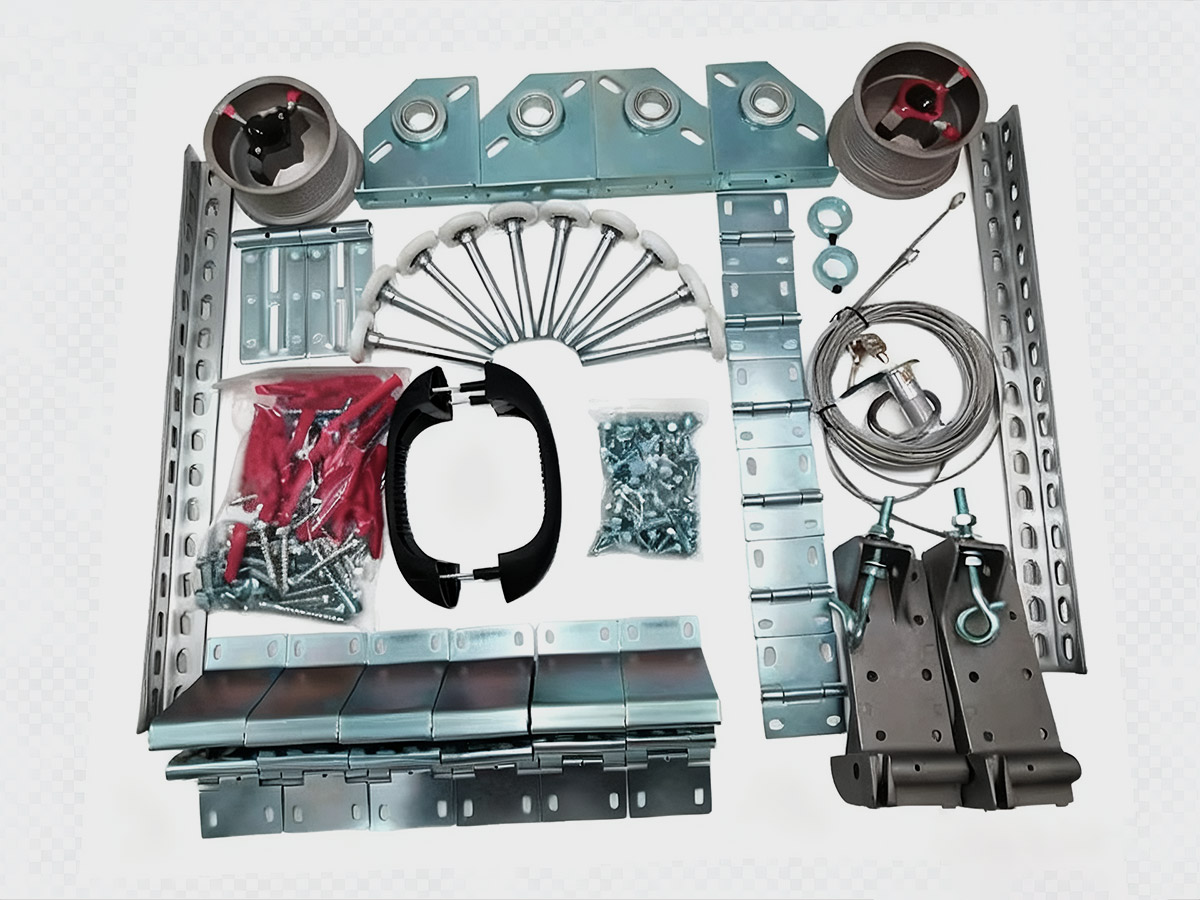
When a Top Roller Bracket Is Not the Problem: Reading the Door’s Installation Clues First
A technician may see a noisy top roller and immediately blame the bracket. That shortcut can lead to repeated replacement without solving the real problem. Before the bracket is treated as the failure source, the installer should observe the top panel position, the roller entry angle into the vertical or curved track, the contact between the bracket base and the door panel, and whether the screw holes show signs of repeated adjustment. These clues separate a true bracket specification issue from an installation geometry issue.
The cataloged range supports this diagnostic approach because the brackets are not all the same. A Residencial Soporte superior is listed at 1.5mm thickness with galvanized finish. Other top bracket variants are listed at 2.0mm and 2.5mm, another top bracket at 2,3 mm, an Soporte superior industrial at 2.5mm thickness and 150mm width, and an Mute Industrial Soporte superior at 2.5mm thickness and 120mm width. These values are not decorative details; they define the mechanical margin available during installation and service.
A practical edge-case model is a door that has been adjusted several times after installation. The roller may still sit inside the track, but the bracket mounting holes may no longer be working from their original clean contact area. Under this condition, the top bracket sees extra eccentric loading because the roller is guiding from one point while the panel pulls from another. A 1.5mm residential bracket may still be acceptable for light residential duty, but it has less bending margin than a 2.0mm, 2.3mm, or 2.5mm bracket. The wrong conclusion would be to call the 1.5mm part defective when the real issue is that it has been placed into a duty cycle or installation geometry beyond its intended range.
A cross-dimensional comparison test can be performed without inventing load ratings. Mount a 1.5mm residential bracket and a 2.5mm industrial top bracket on equivalent test panels, then move the roller through a simulated track entry path while monitoring mounting surface contact, hole movement, and visible deflection. The test does not need to claim a universal force threshold. Its value is comparative: thinner brackets will generally show less resistance to bending because section stiffness increases strongly with thickness. The buyer learns whether the selected bracket has enough margin for the intended door type.
For a broader product context, the manufacturer’s general hardware range can be reviewed through Baoteng garage door hardware, but the selection should remain grounded in the actual top bracket thickness, width, finish, and installation environment.
Top Roller Bracket Garage Door Thickness Selection for Door Duty
Thickness selection should follow duty conditions. A top bracket is not only a stamped metal part; it is a positioning component that keeps the top roller aligned as the panel transitions through the track. If the bracket is too light for the door’s operating cycle, the first symptom may not be immediate breakage. It may be gradual roller angle drift, louder travel, uneven contact marks, or visible movement around fastener holes.
The catalog provides a useful specification ladder. The Residencial Soporte superior is 1,5 mm. General top bracket options include 2.0mm and 2.5mm, with another listed option at 2,3 mm. Industrial top brackets reach 2.5mm thickness, with a 150mm width option for the Industrial Top bracket and a 120mm width option for the Industrial Mute Top bracket. A Top Bracket Support is also listed at 2,0 mm with galvanized finish. Because the base steel grade is not identified in the catalog, a responsible article must not claim a specific steel alloy or heat-treatment route.
| Bracket category | Cataloged thickness | Cataloged width | Practical selection note |
|---|---|---|---|
| Residencial Soporte superior | 1,5 mm | Not specified | Light residential duty and lower cycle expectations |
| Soporte superior | 2.0mm and 2.5mm | Not specified | Broader duty range depending on door weight and cycle frequency |
| Soporte superior | 2,3 mm | Not specified | Intermediate stiffness margin where extra rigidity is desired |
| Soporte superior industrial | 2,5 mm | 150 mm | Higher-duty industrial selection where wider support is useful |
| Mute Industrial Soporte superior | 2,5 mm | 120 mm | Industrial selection where bracket format and quieter operation are relevant |
The edge-case model here is a high-frequency door installed with a light residential bracket because it appears visually similar during procurement. At the beginning, the door may pass a simple open-close test. In the middle phase, the roller axis may begin to settle into a slightly biased path, especially if the track alignment is imperfect. In the late phase, the user may notice noise, scraping, or fastener-hole elongation. This is not a mysterious failure; it is a specification mismatch between bracket thickness and duty.
A comparison case can be built around maintenance tolerance. Two identical doors are installed with different bracket thickness levels. One uses a 1.5mm residential bracket, the other uses a 2.5mm industrial top bracket. If the track is perfectly aligned and the cycle rate is low, both may function acceptably. If the track has minor installation deviation and the door cycles frequently, the thicker bracket has more structural margin before visible deformation or alignment drift becomes obvious. This does not mean the thickest bracket is always the correct choice. It means the bracket should match the door’s duty, not a lowest-cost purchasing habit.
PUNTOS CLAVE
- Repeated screw-hole adjustment near the top panel can indicate installation geometry problems, not just bracket weakness.
- A 1.5mm residential bracket should not be treated as a universal substitute for 2.0mm, 2.3mm, or 2.5mm top brackets.
- Roller angle drift and louder door travel often appear before obvious bracket deformation.
Galvanized Finish as a Service-Life Window, Not a Permanent Anti-Rust Promise
All listed top bracket-related items in the supplied product data use acabado galvanizado. That is a meaningful surface protection feature, but it should be understood as a service-life window rather than a permanent anti-rust promise. Galvanizing helps resist ordinary oxidation and moisture exposure, but it can be locally compromised by installation friction, transport scratching, punched-hole edges, cut edges, repeated fastener movement, and long periods of condensation.
The mechanism is practical. A galvanized surface protects the steel substrate by creating a zinc-based barrier and sacrificial protection behavior. The catalog does not provide zinc coating thickness, zinc mass, steel grade, or salt spray hours, so none of those values should be invented. The correct way to discuss this finish is to connect it with real-use contact points. The bracket is fixed to the door panel, accepts fasteners, and controls the roller position. Its highest-risk corrosion locations are often not the broad flat areas but the edges, holes, rubbed contact areas, and scratched zones.
An edge-case model is an industrial door in a humid warehouse where the top bracket is installed, adjusted, loosened, and re-tightened during commissioning. The first stage may show only superficial shine loss on the mounting area. The second stage may show dull spots around hole edges where the galvanized surface has been scraped. The extreme stage may show red rust if moisture repeatedly reaches exposed substrate areas. This process does not require an aggressive coastal environment. Ordinary condensation plus mechanical damage can shorten the protective window.
A cross-dimensional comparison test should look at both surface condition and mounting accuracy. One galvanized 2.5mm industrial top bracket is installed once with correct alignment. Another is repeatedly removed, re-slotted, or forced into position against a misaligned track. Even when both brackets have the same listed finish, the second bracket is more likely to show surface damage at the fastener points. The lesson for buyers is that finish quality and installation behavior work together. A galvanized part can be well made, yet still fail early if the protective surface is abused during installation.
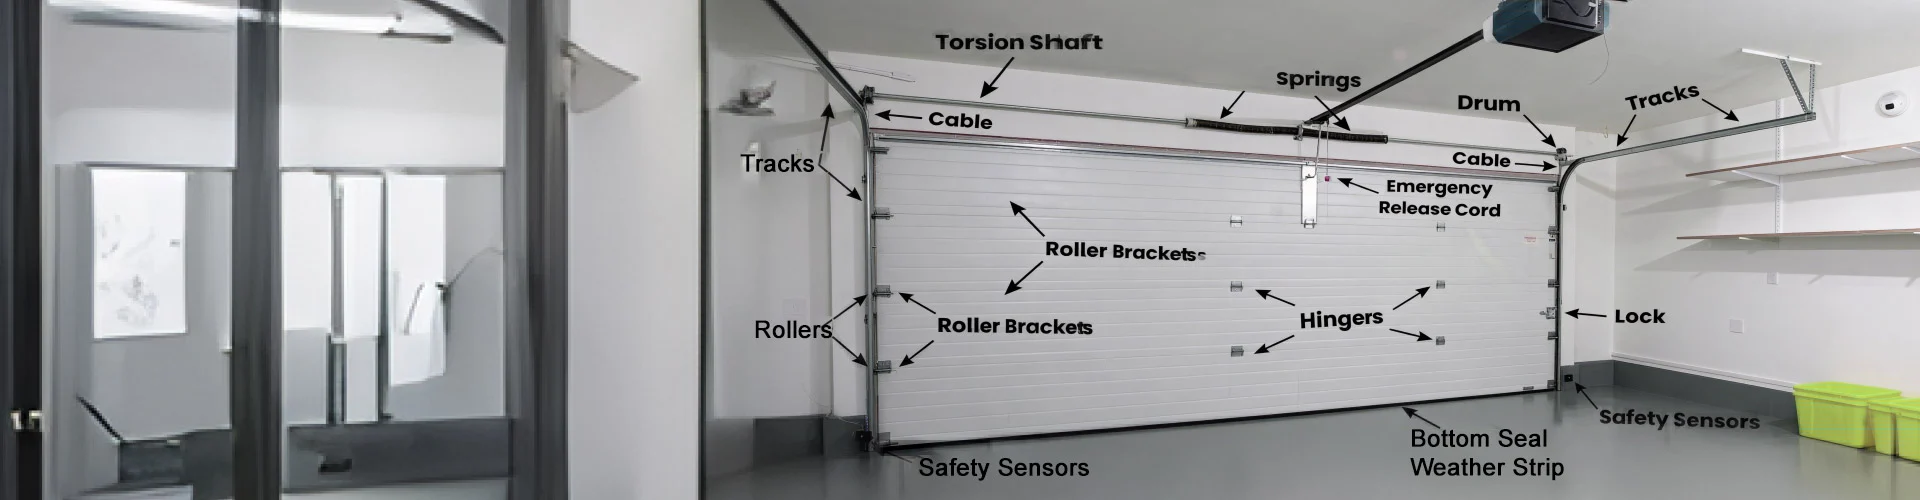
The buying specification should therefore include surface inspection language. It should require no obvious missed plating, peeling, severe scratches, white rust, or transport damage before assembly. For demanding projects, buyers may request corrosion exposure validation based on a recognized method such as ISO 9227, but the requested duration must be defined by contract or project requirement, not guessed from the catalog.
A Buyer’s Acceptance Checklist Before the Bracket Leaves the Factory
A top bracket order should not be accepted only because the product looks similar to the catalog image. Factory acceptance needs a simple but disciplined checklist that connects dimensional inspection, surface condition, and assembly behavior. This is especially important when one supplier offers multiple top bracket levels, such as 1.5mm residential, 2.0mm and 2.5mm top bracket, 2.3mm top bracket, 2.5mm Industrial Top bracket with 150mm width, y 2.5mm Industrial Mute Top bracket with 120mm width.
Solution 1: Confirm bracket thickness against the order before surface inspection.
Execution protocol: The inspector should measure incoming or finished bracket thickness at representative positions and compare it with the ordered specification. A residential order should not accidentally receive a heavier industrial format, and an industrial order should not receive a lighter residential format.
Expected material behavior: Correct thickness improves stiffness margin and reduces the chance of visible bending under the same installation condition. A 2.5mm bracket generally offers more bending resistance than a 1.5mm bracket.
Hidden cost control: Over-specifying thickness can increase cost and may create compatibility issues with existing door geometry. The bracket must match the door system, not only a desire for maximum thickness.
Solution 2: Check width and mounting surface geometry.
Execution protocol: For industrial versions, verify cataloged width values such as 150 mm for the Industrial Top bracket and 120 mm for the Industrial Mute Top bracket. The mounting face should sit flat without rocking.
Expected material behavior: A stable mounting surface distributes contact more evenly and reduces local stress around screw holes.
Hidden cost control: A bracket that is dimensionally correct but not flat can still create roller alignment problems. Flatness inspection prevents later field complaints.
Solution 3: Inspect punched holes, edges, and roller-axis fit.
Execution protocol: Hole location, hole shape, burr condition, and roller-axis fit should be checked before packaging. The roller should not be forced into a misaligned bracket position.
Expected material behavior: Cleaner holes and controlled fit reduce local scraping, fastener movement, and early coating damage.
Hidden cost control: Removing burrs adds process time, but it helps prevent surface injury during assembly and can reduce after-sales adjustment.
Solution 4: Validate galvanized appearance and sample assembly.
Execution protocol: The inspector should check for visible plating defects, severe scratches, peeling, white rust, and transport damage. A sample bracket should be assembled with the intended roller and track to confirm smooth movement and no visible interference.
Expected material behavior: A sound galvanized surface extends the initial corrosion resistance window. Smooth assembly limits avoidable coating abrasion.
Hidden cost control: Sample assembly requires extra time, but it is cheaper than discovering interference after the parts arrive at the installation site.
| Acceptance variable | Inspection method | Expected tolerance logic | Risk if ignored |
|---|---|---|---|
| Espesor | Caliper or gauge check | Match 1.5mm, 2.0mm, 2.3mm, or 2.5mm order requirement | Wrong duty selection |
| Anchura | Dimensional measurement | Confirm 120mm or 150mm where specified | Poor fit or wrong bracket class |
| Hole position | Gauge or fixture check | Consistent with roller and fastener layout | Roller axis drift |
| Bend geometry | Angle and flatness check | Stable mounting contact | Panel contact stress |
| Acabado galvanizado | Visual inspection, project testing if required | No obvious peeling, missed areas, severe scratches, or white rust | Shortened corrosion protection window |
| Sample assembly | Roller and track fit check | Smooth motion without forced alignment | Noise, rubbing, field rework |
CONSEJO DE EXPERTO / LISTA DE COMPROBACIÓN
- Confirm whether the project is residential, commercial, or industrial before selecting bracket thickness.
- Do not replace a 2.5mm industrial bracket with a 1.5mm residential bracket only because the shape looks similar.
- Check top panel alignment before blaming the bracket for noise.
- Inspect screw holes for repeated adjustment marks or elongation.
- Verify galvanized finish condition before installation, especially around holes and edges.
- Test one bracket with the intended roller and track before accepting a batch.
- Record thickness and width requirements directly on the purchase order.
- Avoid adding unverified steel grades, coating thicknesses, or load ratings unless the supplier confirms them in writing.
Preguntas más frecuentes (FAQ)
How do you close a garage door manually?
Disconnect the opener according to the opener manufacturer’s instructions, then lower the door carefully by hand. If the top roller bracket or track area is misaligned, do not force the door downward. Forced movement can worsen roller binding, bracket deformation, or panel damage.
How to change garage door code?
Garage door code changes are controlled by the opener or keypad system, not the top roller bracket. Follow the opener manufacturer’s programming steps. Bracket condition still matters because a door with roller alignment problems may strain the opener even when the remote code works correctly.
How to set LiftMaster garage door opener?
Use the official LiftMaster setup procedure for travel limits, force settings, and remote pairing. Before final adjustment, confirm the door moves smoothly by hand. If the top roller bracket is bent or mismatched, opener calibration may hide the mechanical problem instead of solving it.
How to bypass garage door sensors?
Bypassing safety sensors is not recommended. Sensors are safety components, while the top roller bracket is a mechanical guide component. If the door will not close, inspect sensor alignment, track obstruction, roller travel, and top bracket condition rather than disabling a safety function.
How to program a universal garage door remote?
A universal remote is programmed through the opener’s learn button and the remote manufacturer’s instructions. Remote programming will not correct mechanical resistance. If the door jerks, rubs, or becomes noisy near the top track, inspect the top roller bracket, roller path, and mounting holes.
 English
  Русский
  日本語
日本語  한국어
한국어  Français
  Deutsch
  العربية
  Português
  Español