
Vergleich sicherer Unterlager für Garagentore
Referenzstandard: Relevant material and performance testing standards may include ASTM B117 salt spray practice und ISO 9227 corrosion test guidance as general surface-finish screening references. They are not catalog-certified claims for this product unless a supplier provides separate test documentation.
Kurze Antwort
Before the Door Moves: Reading the Track Size Clue First
The first comparison is not between price, appearance, or even whether the part is called “safe.” It is between the physical track system and the bracket geometry that must work inside it. The catalog identifies Safe Bottom Bracket variants for 3-Zoll-Kette and a residential Safe Bottom Bracket for 2-Zoll-Kette, each tied to an 11-mm-Rollenwelle und eine verzinkte Oberfläche. That small group of numbers is the technical center of the article: 2-Zoll-Kette, 3-Zoll-Kette, und 11-mm-Rollenwelle.
A bottom bracket works in the lower door zone, where the roller shaft, track clearance, door movement, and fastened bracket body interact during every opening and closing cycle. When a bracket intended for a 3-Zoll-Kette is treated as interchangeable with a 2-Zoll-Kette system, the problem may not appear as a dramatic break. It may appear as a quieter installation problem: the roller shaft sits under a different spatial constraint, the roller path is less tolerant of side pressure, and the lower panel may begin its movement with small friction signals that are easy to blame on lubrication, weather, or door age.
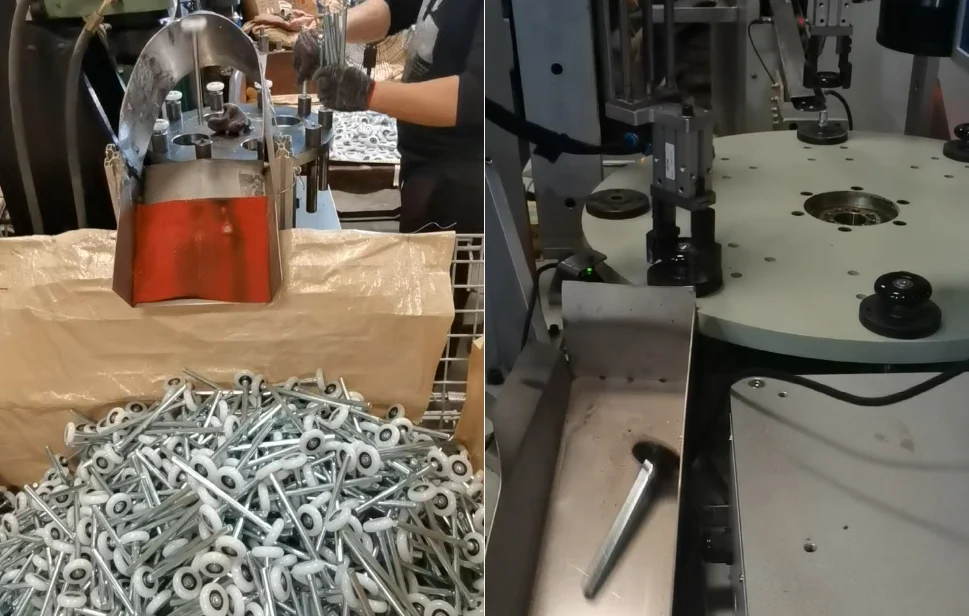
A useful field comparison is to treat the bracket as part of a geometry chain rather than a standalone spare part. The chain begins at the track width, continues through the roller shaft diameter, and ends at the bracket mounting position. The catalog-supported comparison can be summarized as follows:
| Catalog direction | Track fit | Roller shaft | Oberflächenbeschaffenheit | Selection meaning |
|---|---|---|---|---|
| Residential Safe Bottom Bracket | 2-Zoll-Kette | 11mm | Verzinkt | Used where the installed door system follows a 2″ track layout |
| 3″ Safe Bottom Bracket, unadjustable | 3-Zoll-Kette | 11mm | Verzinkt | Used where fixed-position installation is acceptable |
| 3″ Safe Bottom Bracket, adjustable | 3-Zoll-Kette | 11mm | Verzinkt | Used where field tolerance may need controlled adjustment |
| 3″ Safe Bottom Bracket, adjustable variant | 3-Zoll-Kette | 11mm | Verzinkt | Used where the 3″ system requires an adjustable safe bottom bracket option |
Edge extreme scenario model: imagine a maintenance team receives mixed cartons of lower brackets for multiple garage door types. The part visually resembles the needed item, the finish is also galvanized, and the roller shaft reference remains 11mm. The installer only notices the issue after the bracket is positioned near the track. At that point, the difference between 2″ und 3″ is no longer a catalog detail; it becomes a spatial conflict. The bottom roller may still be inserted, but the movement path can develop side loading or uneven seating. The failure mode is not necessarily immediate. It may begin as installation resistance, then develop into repeated friction marks, and later become a service complaint.
Cross-dimensional comparison test case: compare two inspection benches. Bench A sorts brackets by visual family only: bottom bracket, safe bottom bracket, track bracket. Bench B sorts by function and data: 2-Zoll-Kette, 3-Zoll-Kette, 11-mm-Rollenwelle, adjustable or unadjustable, galvanized finish condition. Bench B prevents more installation errors because it checks the bracket as a system component, not as a loose metal shape. No additional strength claim is needed. The information gain comes from using the catalog’s actual dimensions as the sorting logic.
WICHTIGSTE ERKENNTNISSE
- A bracket can look correct but still fail the installation check if the 2″ / 3″ track match is wrong.
- Die 11-mm-Rollenwelle should be treated as a fit-control point, not a decorative specification.
- Galvanized finish does not solve geometry mismatch; it only supports surface corrosion resistance when intact.
Adjustable or Unadjustable: The Small Decision That Changes Field Tolerance
The second comparison is between adjustable and unadjustable Safe Bottom Bracket options. It is tempting to say adjustable is automatically better, but that would be too simple and not fully useful. A fixed bracket can be the right option when the door system is consistent, the track layout is known, and the installer wants repeatable placement without extra adjustment decisions. An adjustable bracket can be more practical when field conditions are less predictable, when replacement work must account for variation, or when the installer needs controlled positioning during fitting.
The catalog-supported distinction is specific: one 3″ Safe Tretlager direction is unadjustable, while other 3″ Safe Tretlager directions are adjustable. The catalog also lists a residential 2″ Safe Tretlager. This creates a practical comparison matrix: first choose track family, then choose whether field tolerance matters. The correct decision is not “adjustable versus unadjustable” in isolation. It is “adjustability under the correct track size and roller shaft requirement.”
A mechanical reason sits behind this choice. In a lower bracket position, small differences in installation position can influence how the roller shaft enters the track and how the lower door section begins its travel. When the bracket is unadjustable, the mounting and geometry must be accurate enough at installation. When the bracket is adjustable, the installer receives a controlled way to account for fit variation, but the adjustment itself must still be locked, inspected, and sorted correctly. Adjustment is not a substitute for correct specification.
Edge extreme scenario model: consider a replacement job where the original door has accumulated slight panel deformation or mounting variation from long service. A fixed-position bracket may fit cleanly on one door but feel constrained on another door with a similar appearance. In that case, an adjustable 3″ Safe Tretlager may provide useful field tolerance, provided that the track is truly 3″ and the roller shaft requirement remains 11mm. The risk is choosing adjustability as a shortcut without confirming track size. That only moves the error downstream.
Cross-dimensional comparison test case: compare a new-build installation and a repair installation. In a new-build condition, parts may come from a controlled hardware package, so an unadjustable bracket can support repeatable assembly if all matching conditions are confirmed. In a repair condition, the installer may face older panels, mixed hardware, or uncertain previous maintenance. Adjustable options may reduce fitting friction, but they increase the need for model identification and final position verification. The comparison is not about better or worse; it is about tolerance strategy.
PROFI-TIPP / CHECKLISTE
- Confirm whether the installed track is 2″ oder 3″ before selecting the bracket.
- Verify that the bracket direction is for an 11-mm-Rollenwelle.
- Separate adjustable and unadjustable Safe Bottom Bracket stock before packing.
- Do not replace a 2″ residential bracket with a 3″ bracket based on appearance alone.
- Check the galvanized surface after trial fitting, especially around contact and fastened areas.
- Record the selected bracket type on the packing or installation document.
- Reject any bracket with visible deformation that may alter roller shaft alignment.
The Bottom-Zone Reality: Dirt, Moisture, and Galvanized Surface Discipline
The third comparison is between a clean catalog view and the real lower-door environment. A Safe Bottom Bracket is not installed in the middle of a protected cabinet. It works near the floor, close to water splash, condensed humidity, dust, grit, and contact marks from handling or installation. The catalog states Oberfläche: verzinkt, which matters because galvanized surfaces are commonly used to support corrosion resistance. Yet it would be inaccurate to claim a specific salt-spray hour rating, zinc coating thickness, or service life unless separate documents are supplied.
The useful technical point is surface discipline. Galvanizing works through a protective zinc layer. When intact, that layer helps delay corrosion of the underlying metal. When scratched, cut, heavily abraded, or damaged at an edge, the protective behavior can become less uniform. A bottom bracket sees exactly the kind of environment where this matters: lower position, moisture exposure, and possible abrasion from dirt or installation tools. This does not mean the bracket is weak. It means the finish must be treated as a functional surface, not just a silver color.
A factory and installer should compare three surface states. The first is a clean galvanized bracket with no visible red rust, severe scratch, or flaking. The second is a bracket with light cosmetic marks that do not expose or deform critical areas. The third is a bracket with visible damage, burrs, bending, or surface failure around working edges and mounting contact zones. Only the third condition should raise a stronger inspection response, because the bracket is not simply being judged for appearance; it is being judged for fit and long-term exposure.
Edge extreme scenario model: place a galvanized bottom bracket in a garage that sees wet tires, floor washdown, and dust carried into the door threshold. During early service, moisture and grit collect near the lower hardware. In the middle phase, repeated movement and small particles can polish or scratch contact-prone areas. In the limit phase, any exposed or deeply damaged area may show faster oxidation than the surrounding galvanized surface. This is a general physical corrosion pathway, not a catalog performance claim.
Cross-dimensional comparison test case: compare two brackets with identical 3-Zoll-Kette und 11-mm-Rollenwelle fit. One has an intact galvanized finish and clean edges. The other has deep shipping scratches and a raised burr near a contact point. The geometry may still measure similarly at first, but the second bracket has two added risks: surface degradation under moisture and possible interference during installation. This is why surface inspection must remain tied to fit inspection.
| Inspection variable | Acceptable direction | Risk signal | Correct response |
|---|---|---|---|
| Track match | 2″ or 3″ confirmed | Track assumed by appearance | Recheck before installation |
| Roller shaft fit | 11mm confirmed | Binding or loose seating | Inspect shaft and bracket match |
| Oberflächenbeschaffenheit | Galvanized, no severe damage | Red rust, exposed areas, flaking | Reject or escalate inspection |
| Bracket type | Adjustable or unadjustable identified | Mixed stock in same bin | Re-sort and label |
| Packing condition | Parts separated from sharp contact | Brackets scratching each other | Add separation or protection |
A Factory Checklist Built Around Evidence, Not Assumptions
The final comparison is between assumption-based supply and evidence-based supply. Assumption-based supply says: the part looks like a bottom bracket, the finish looks galvanized, and the order probably matches. Evidence-based supply says: the model, track size, roller shaft requirement, adjustability, finish condition, and packing state must all be verified before shipment or installation.
Because the catalog does not provide a dedicated Safe Bottom Bracket QC standard, it is more responsible to use a general hardware inspection logic rather than inventing certifications. A practical acceptance process can include incoming material review where available, visual checks for galvanized surface integrity, dimensional checks around the stated 2″ / 3″ track application and 11-mm-Rollenwelle fit, functional pairing with representative hardware, and packing inspection to reduce transit scratching. These checks do not require false claims. They convert limited catalog data into controlled production behavior.
Solution 1: Model and track-size separation.
Execution Protocol: Separate Safe Bottom Bracket stock by 2-Zoll-Kette und 3-Zoll-Kette before final packing. The label should make the track family visible to warehouse staff and installers. Mixing should be prevented at the bin level, not corrected later by customer service.
Expected material behavior: This does not change the galvanized material surface, but it reduces the chance of forced installation, contact stress, and tool damage caused by trying to fit the wrong bracket into the wrong track environment.
Hidden cost and prevention: The cost is extra sorting discipline and labeling time. The prevention method is simple: keep the part family, track size, and adjustability state in the same inspection record.
Solution 2: Roller shaft fit verification.
Execution Protocol: Use the catalog-supported 11-mm-Rollenwelle requirement as a fit checkpoint. A sample pairing process should confirm that the shaft can be positioned without obvious binding, excessive looseness, or forced assembly.
Expected material behavior: Correct fit reduces abnormal friction and avoids unnecessary local contact marks on galvanized surfaces during test fitting or installation.
Hidden cost and prevention: Overchecking every unit may slow throughput. Sampling can be used for routine batches, while full inspection can be reserved for mixed stock, complaint returns, or first-article confirmation.
Solution 3: Galvanized surface inspection.
Execution Protocol: Inspect for visible rust, severe scratches, coating damage, burrs, deformation, and sharp contact marks. Do not treat all cosmetic marks as functional failures, but do escalate damage that affects mounting, movement, or corrosion exposure.
Expected material behavior: A cleaner galvanized surface provides more consistent environmental resistance in the lower garage door zone, where moisture and dirt are more likely.
Hidden cost and prevention: Overly strict cosmetic rejection can waste usable parts. The inspection rule should separate cosmetic appearance from functional risk.
Solution 4: Packing separation and final evidence record.
Execution Protocol: Pack brackets so sharp edges and raised features do not repeatedly rub against one another during transit. Final documents should preserve the selected type: 2″ residential, 3″ adjustable, oder 3″ unadjustable, together with the 11mm shaft reference and galvanized finish condition.
Expected material behavior: Better packing reduces scratches before installation, helping the galvanized finish arrive closer to its inspected condition.
Hidden cost and prevention: Protective packing adds handling time and material. The cost is justified when the shipment contains mixed bracket types or when long-distance transit may create vibration and surface rubbing.
For related garage door hardware sourcing context, review Baoteng garage door hardware products as the broader product source page.
Häufig gestellte Fragen (FAQ)
Where to lube garage door hardware near a Safe Bottom Bracket?
Lubrication should target moving contact points such as rollers, hinges, and tracks according to the door manufacturer’s maintenance guidance. Do not use lubrication to hide a wrong 2″ / 3″ track bracket match or poor 11-mm-Rollenwelle fit. Fit errors should be corrected mechanically.
How to program a garage door opener to a car after replacing a bottom bracket?
Programming an opener to a car is an electrical control task, not a bottom bracket task. Replace or inspect the Safe Bottom Bracket first, confirm the door moves freely by hardware fit, then follow the opener brand’s remote programming procedure for the vehicle system.
How to paint a garage door without damaging bottom hardware?
Painting should avoid coating moving hardware, roller contact zones, or bracket interfaces. A galvanized Safe Bottom Bracket should remain identifiable by model and fit direction. Paint overspray can hide scratches, rust signals, or adjustable positioning marks that are useful during inspection.
How to program a LiftMaster garage door opener if the door movement feels rough?
Do not begin with opener programming if the door movement feels rough. First check track size, roller shaft fit, and bottom bracket condition. A 2″ / 3″ mismatch or a poor 11-mm-Rollenwelle fit can create mechanical resistance that programming will not solve.
 English
  Русский
  日本語
日本語  한국어
한국어  Français
  Deutsch
  العربية
  Português
  Español