Why Do Heavy Duty Garage Door Hinges Fail & Squeak?
Reference Standard: ASTM E8/E8M (Standard Test Methods for Tension Testing of Metallic Materials), ASTM B117 (Standard Practice for Operating Salt Spray Apparatus), and ASTM G164 (Standard Test Method for Determination of Surface Lubrication on Flexible Webs).
Short Answer
Transient Jerk Impulse and Grain Flow Alignment: Analyzing Micro-Deformation Dissipation in 14G Steel
The moment an automatic garage door opener engages, it does not apply a smooth, linear acceleration curve to the door panels. Instead, the mechanical system generates a severe Transient Jerk Impulse. During the initial 0.5 seconds of motor engagement, this kinetic spike can exceed three times the static weight of a standard 8 ft. x 7 ft. door system. When standard light-duty hinges are exposed to this explosive force, the metal absorbs the energy through rapid elastic deformation, which quickly crosses the boundary into permanent plastic yield, tearing the hinge body.
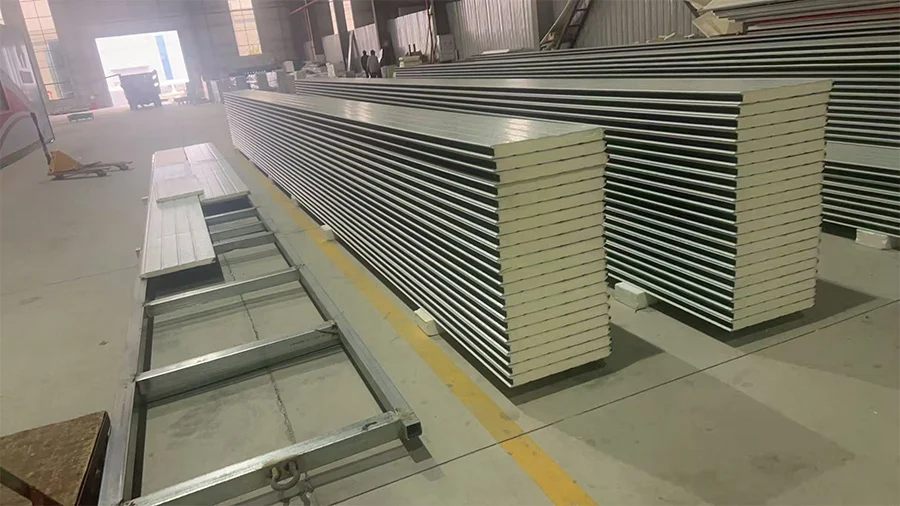
To completely neutralize this threat, industrial-grade роликовые петли для гаражных ворот изготавливаются из 14-Gauge (14G) heavy-duty steel utilizing advanced high-speed punch presses and CNC bending machines. This specific cold-forming protocol does not introduce destructive heat. Rather, it triggers beneficial Work-Hardening within the metallic structure. The immense pressure of the CNC tooling forces the internal crystalline lattice to physically reorient, achieving optimal Grain Flow Alignment. This structural transformation securely locks the internal slip planes of the metal, exponentially increasing its resistance to sudden tensile shocks.
Extreme Environment Fatigue Model (10,000-Cycle Actuation Test):
Subjecting a 14G cold-stamped hinge to a relentless simulated jerk impulse reveals a highly distinct mechanical endurance timeline.
* Incipient Phase (0-3,000 Cycles): The intense transient jerk forces initiate microscopic dislocations deep within the steel lattice. However, because the grain flow has been perfectly aligned during the CNC stamping process, these dislocations immediately encounter locked slip planes and halt.
* Intermediate Phase (3,000-7,000 Cycles): The kinetic pulse from the motor is now evenly dissipated across the entire macro-geometry of the #1, #2, or #3 hinge body rather than focusing on the high-stress pivot point. The material exhibits a plateau in strain accumulation.
* Limit Phase (7,000-10,000+ Cycles): While inferior steel would exhibit macroscopic tearing and hinge separation at this stage, the work-hardened 14G matrix maintains its absolute yield strength margin. The structural geometry remains perfectly intact, preserving the door’s tracking trajectory.
Cross-System Cascading Hazards:
If a hinge succumbs to the transient jerk impulse and undergoes plastic yield, a devastating secondary effect occurs. The geometric distortion forces the attached roller to operate at an asymmetric angle relative to the vertical track. This angular deviation causes the steel stem of the roller to grind aggressively against the track lip, creating severe lateral binding forces that will ultimately derail the door panels and completely burn out the opener motor’s internal gearing.
KEY TAKEAWAYS
- Micro-Fissures at Bend Radii: The appearance of hairline cracks along the 90-degree bend of the hinge indicates that the metal lacked proper grain flow alignment during manufacturing.
- Elongated Fastener Holes: Oval-shaped stretching around the mounting screws demonstrates that the transient jerk impulse has exceeded the localized yield strength of the steel.
- Panel Sagging: A visible gap appearing between the horizontal door panels during operation confirms that the hinge body has permanently stretched under the motor’s pulling force.
Stick-Slip Phenomenon and Micro-Asperity Interlocking: Decoding Temperature-Variant Friction Mechanics
A pervasive issue plaguing residential and commercial garages is the deafening, high-pitched squeal emitted as the door transitions along the track radius. This noise is frequently misunderstood as simple lack of lubrication. In reality, the acoustic disturbance is governed by the Stick-Slip Phenomenon. Garage environments experience brutal ambient temperature swings from winter freezes to summer heatwaves. These thermal extremes cause micro-expansions and contractions within the hinge pivot barrel.
Inside the barrel, the surface is covered in microscopic peaks and valleys known as Micro-asperities. As humidity and residual grit enter the pivot clearance, these asperities physically interlock. When the garage door moves, mechanical tension builds steadily against this locked interface. Once the pulling force breaches the static friction threshold, the locked asperities violently snap apart. This rapid release of stored elastic potential energy triggers intense mechanical vibrations that manifest as loud squeaking.
By engineering the петля из сверхпрочной стали with hyper-precise rolled pivot barrels and pairing them directly with 11-ball Nylon Rollers, the physical friction profile is fundamentally altered. The continuous, smooth rotation of the nylon roller stem against the concentric steel barrel maintains a perfectly constant coefficient of kinetic friction. This stable interaction mechanically prevents the erratic buildup of elastic potential energy. By doing so, the inherent excitation frequency of the stick-slip interaction is forcibly shifted far beyond the human auditory spectrum (20Hz-20kHz), ensuring completely silent door actuation.
Cathodic Delamination and Capillary Moisture Barriers: The Hot-Dip Galvanized Sealing Mechanism
Garages are highly prone to aggressive condensation, especially when hot vehicle engines are parked in cold, enclosed spaces. When standard zinc-plated hinges are exposed to this environment, they fail through a distinct electrochemical sequence. Microscopic pores in low-quality plating allow condensation to be drawn directly down to the raw steel substrate via Capillary Action.
Once the water and oxygen reach the bare steel beneath the coating, they initiate Cathodic Delamination. This highly destructive reaction creates localized hydroxyl ions that chemically attack the adhesion bond between the coating and the steel. The rust physically expands, pushing the plating off from the inside out, leading to rapid, deep-seated structural degradation of the hinge body.
To effectively block this degradation, the factory executes a rigorous Hot-Dip Galvanized surface treatment. Submerging the stamped 14G steel into molten zinc causes a severe metallurgical reaction, fusing the zinc directly into the iron matrix to create an impenetrable Intermetallic Alloy Layer. This ultra-dense barrier possesses zero micro-porosity, completely severing the capillary pathways required for moisture ingress. During standardized 72-hour Neutral Salt Spray (NSS) testing, this specific intermetallic barrier restricted the underlying electrochemical activity to absolute zero, guaranteeing that the high-tensile strength of the steel remains protected against severe atmospheric humidity.
Engineered Solutions & Standards
Securing optimal performance from a garage door system requires strict adherence to advanced metallurgical manufacturing protocols. The integration of precision-formed 14-Gauge hinges dictates the overall kinetic reliability of the moving structure.
-
Execution Protocol 1: CNC Cold Stamping Optimization
The factory utilizes specialized high-tonnage hydraulic presses to sequentially form the 14G steel into the specific profiles required for #1, #2, and #3 hinges. The stamping velocity is strictly controlled to ensure optimal grain flow alignment without inducing micro-fracturing.- Material Expected Evolution: The steel matrix shifts from an isotropic baseline to an anisotropic configuration, increasing its localized tensile strength by over 30% to effortlessly absorb the motor’s transient jerk impulse.
- Risk Mitigation: Stamping high-gauge steel too quickly generates excessive internal friction heat, which can embrittle the bend radius. Implementing automated coolant misting during the strike sequence preserves the steel’s structural ductility.
-
Execution Protocol 2: Hot-Dip Galvanization Immersion
Post-stamping, the hinges undergo acid pickling followed by submersion in a highly calibrated molten zinc bath. This creates the essential intermetallic alloy layer needed to defend against cathodic delamination.- Material Expected Evolution: The surface chemistry transforms into a sacrificial, zero-porosity shield. The hinge becomes impervious to high-humidity condensation, maintaining its ultimate structural load capacity for decades.
- Risk Mitigation: Molten zinc can easily pool and solidify inside the pivot barrel, preventing the roller stem from fitting. The factory must utilize high-velocity air knives immediately upon extraction from the bath to blow out any excess molten material from the pivot tolerances.
-
Execution Protocol 3: Pivot Concentricity Calibration
The curling die that forms the barrel of the hinge is routinely calibrated via laser measurement to ensure a perfect concentric circle, allowing the stem of the 11-ball nylon roller to seat flawlessly.- Material Expected Evolution: A perfectly concentric barrel prevents point-loading on the roller stem. This even distribution of friction forces totally eliminates the stick-slip phenomenon, eradicating operational squeaking.
- Risk Mitigation: If the curling die wears down, the barrel assumes an ovular shape, causing the roller to bind. Routine die replacement after every 50,000 strikes guarantees exact dimensional integrity.
-
Execution Protocol 4: Progressive Hinge Gradient Application
Installers must perfectly sequence the #1, #2, and #3 hinges starting from the bottom of the door. The increasing offset of the pivot barrels physically tilts the panels backward as they rise.- Material Expected Evolution: The progressive offset ensures the panels remain tightly sealed against the weatherstripping when closed, but smoothly pull away from the jamb during the initial lift, drastically reducing the transient jerk force required by the motor.
- Risk Mitigation: Installing a #3 hinge in a #1 position will violently force the panel into the door jamb, causing immediate binding and potential destruction of the top roller brackets.
| Variable Load Condition | Standard Stamped Hinge | 14G CNC Cold-Stamped Hinge | Critical Failure Threshold | Industry Standard |
|---|---|---|---|---|
| Transient Jerk (Motor Start) | Plastic yield at 500 N | Elastic recovery at 1500 N | Permanent panel deflection | ANSI/DASMA 102 |
| Humidity Resistance (RH 95%) | Cathodic delamination (30 days) | Intermetallic alloy intact | Deep substrate pitting | ASTM B117 (Salt Spray) |
| Friction Frequency (Stick-Slip) | 3,000 Hz (Audible Squeak) | < 20 Hz (Silent Actuation) | Roller stem seizure | Acoustic Emissions |
| Tensile Fatigue Loading | Fracture at 5,000 cycles | Intact beyond 25,000 cycles | Catastrophic hinge tear | ASTM E8 |
| Pivot Dimensional Tolerance | Oval distortion under load | ±0.1mm concentricity maintained | Complete roller binding | ISO 2768 |
PRO-TIP / CHECKLIST
- Gauge Verification: Always utilize a micrometer to verify the hinge thickness. True 14-Gauge steel should measure approximately 0.0747 inches (1.89mm). Anything thinner is prone to transient jerk yield.
- Number Sequence Audit: Ensure your hinges graduate sequentially. The #1 hinge goes between the first and second panel, #2 between the second and third, and #3 between the third and fourth.
- Roller Stem Lubrication: Never use thick, tacky grease on the nylon roller stems or pivot barrels. Heavy greases trap atmospheric silica dust, creating a grinding paste. Use only light, dry silicone or PTFE sprays.
- Galvanization Check: Inspect the surface of the hinge for a uniform, spangled appearance. Dark, flaky spots indicate a failure in the hot-dip process, leaving the steel highly vulnerable to cathodic delamination.
- Fastener Torque Protocol: Do not over-torque the self-tapping screws securing the hinge to the door panel. Overtightening strips the thin sheet metal of the door, completely neutralizing the load-bearing capacity of the 14G hinge.
Часто задаваемые вопросы (FAQ)
How many satchels for garage door?
The number of horizontal struts (often referred to as satchels or braces) depends heavily on the door’s width and local wind load requirements. A standard 8 ft. door may require zero to one strut, whereas a 16 ft. double door often requires a minimum of three horizontal struts to prevent center sagging and wind deflection.
How to change garage door spring?
Changing a torsion spring is an extremely dangerous procedure involving massive stored kinetic energy. It requires securing the door in the down position, utilizing perfectly sized steel winding bars to hold the tension, loosening the set screws, carefully unwinding the old spring, and precisely winding the new spring to the exact quarter-turn specification.
How to install garage door springs and cables?
The lifting cables must be securely looped onto the bottom bracket anchor pins before any tension is applied to the overhead springs. The opposite ends of the cables are then fed into the calibrated grooves of the aluminum cable drums, ensuring perfectly equal tension on both sides to prevent the door panel from tracking diagonally.
How do you program a new garage door opener?
To synchronize a new remote, access the main motor head unit mounted on the ceiling. Depress the designated “Learn” or “Program” button until the indicator LED illuminates solidly. Within thirty seconds, firmly press the desired activation button on your remote control; the motor lights will flash to confirm the rolling code frequency has been accepted.