Why Do Steel Garage Door Rollers Grind and Rust? A Tribological Analysis
Reference Standard: ISO 15243 (Rolling bearings — Damage and failures) and ASTM G119 (Standard Guide for Determining Synergism Between Wear and Corrosion) for evaluating the dynamic degradation of high-carbon steel kinematics in heavy-load track systems.
Short Answer
Metallurgical Cold-Welding: The Genesis of Track-to-Roller Galling
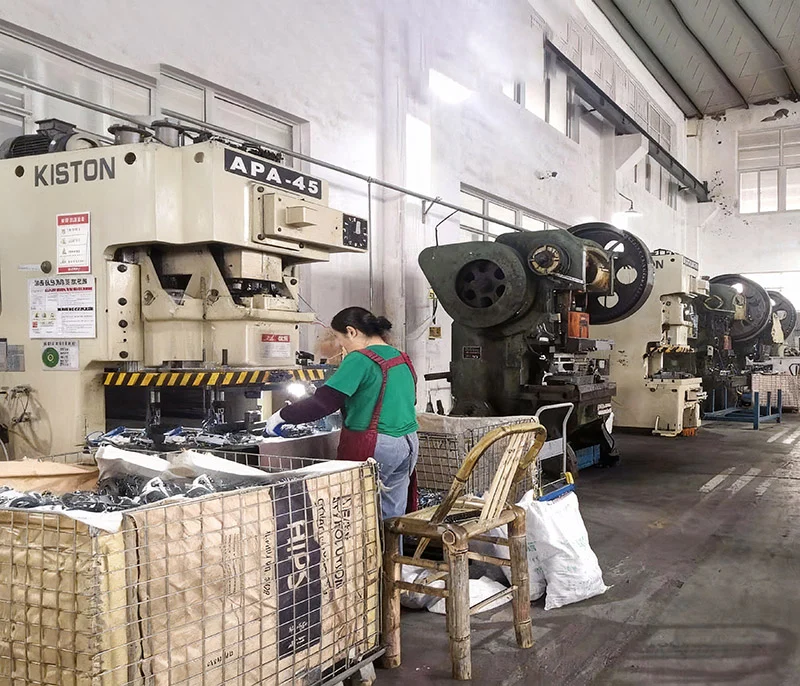
In ultra-heavy commercial warehouses and solid-wood residential doors, steel garage door rollers are chosen for their extreme static load capacity. However, placing a raw carbon steel wheel inside a carbon steel track creates a severe tribological hazard. Without an active Extreme Pressure (EP) hydrodynamic lubrication boundary, the interface suffers from “Metallurgical Cold-Welding.”
At a microscopic level, neither the steel wheel nor the track is perfectly smooth. They are covered in microscopic peaks called asperities. Under the immense radial load of a 400 lb garage door, the Hertzian contact stress at these asperities can easily exceed 1.5 GPa. This extreme pressure forces the metal atoms so close together that they share electrons, literally welding the wheel to the track for a fraction of a millisecond. As the door continues to move, these micro-welds are violently torn apart. This destructive process, known as “Adhesive Wear” or “Galling,” instantly spikes the Coefficient of Friction (COF) from a baseline of 0.15 up to a critical >0.8. This sudden jump in frictional resistance converts kinetic energy into high-frequency mechanical tremors, generating the piercing, resonant screech commonly associated with failing heavy-duty hardware.
The Extreme Tribological Degradation Timeline:
* Phase 1: Asperity Deformation (0-2,000 Cycles): Initial operation flattens the largest asperities. The steel roller appears to function smoothly, but microscopic metallic debris is already being generated within the track groove, acting as a secondary abrasive medium.
* Phase 2: Cold-Welding and Tearing (2,000-8,000 Cycles): As the factory-applied surface oils evaporate, direct metal-to-metal contact increases by 70%. Interfacial micro-welds form and snap thousands of times per second. The wheel begins to chatter, and the acoustic output increases from 65 dB to over 85 dB.
* Phase 3: Macro-Galling and Track Gouging (8,000+ Cycles): Large fragments of the carbon steel wheel are torn away and embedded into the track. The roller no longer spins freely; it drags and skids. This dragging carves deep longitudinal gouges into the C-channel track, fundamentally destroying the kinematic pathway.
This continuous galling triggers an often-ignored “Torsional Drag Paradox.” As one side of the door experiences higher friction than the other due to severe cold-welding, the entire door panel twists diagonally. This asymmetrical load forces the lift cables to spool unevenly, threatening the alignment of the entire torsion spring assembly.
KEY TAKEAWAYS
- Silver Flaking Accumulation: The presence of bright, silver metallic flakes at the curved sections of the track is absolute confirmation that localized cold-welding and adhesive tearing are actively destroying the roller tread.
- Jerky Door Ascent: If the door shudders violently during the first 12 inches of upward travel, the static friction has spiked above 0.8, indicating the wheels are skidding rather than rolling.
- Temperature Spikes: After a full open/close cycle, a failing steel roller will be noticeably hot to the touch due to the massive conversion of kinetic energy into frictional heat at the cold-weld interfaces.
Cathodic Shield Eradication: Analyzing the Accelerated Oxidation of Stripped Tracks
The mechanical violence of galling introduces a secondary, equally destructive chemical phase: “Cathodic Shield Eradication.” Standard garage door tracks are manufactured from galvanized steel, utilizing a 10μm to 15μm layer of zinc. This zinc acts as a “Sacrificial Anode,” maintaining a galvanic potential that prevents the underlying iron from oxidizing.
As the raw carbon heavy duty steel roller wheels skid and grind against the track, they act as mechanical milling tools. Empirical data shows that an unlubricated, binding steel roller can scrape away the zinc coating at an aggressive rate of 2.5μm per 1,000 cycles. Once the localized zinc layer is eradicated, the bare steel substrate is exposed to atmospheric oxygen and humidity. Because the remaining zinc and the newly exposed iron possess a galvanic potential difference of roughly 400mV, an active galvanic micro-cell forms in the presence of condensation. This accelerates the anodic dissolution of the iron, causing exponential red rust (Iron(III) oxide) propagation that rapidly pits and weakens the structural integrity of the vertical tracks.
Raceway Spalling Kinetics: How Ingested Silica Destroys Open-Bearing Symmetries
While the exterior of the wheel fights cold-welding, the interior faces an entirely different physics phenomenon. Many baseline steel rollers utilize an “Open Bearing” design. In agricultural or warehouse environments, airborne silica particulates (sand and concrete dust) are highly prevalent.
When these silica particulates are ingested into the open bearing raceway, they trigger “Sub-surface Spalling Kinetics.” Silica boasts a Brinell Hardness of approximately 1000-1200 HB, whereas standard 52100 bearing steel sits around 600-650 HB. When a 50μm silica grain gets trapped between the steel ball and the raceway under a 100 lb dynamic load, it acts as an ultra-hard micro-indenter. It does not crush; instead, it presses a permanent dent into the steel raceway. The extreme stress concentration at the rim of this microscopic dent exceeds the fatigue limit of the alloy, initiating sub-surface cracks. As these cracks propagate to the surface, chunks of the raceway flake off (spalling). This permanently destroys the 10-ball geometric symmetry, causing the bearing to seize, which forces the wheel to drag and accelerates the track galling previously discussed.
Zinc-Plated Maturation and Sealed Kinematics: Re-engineering the Carbon Steel Roller
To break the cycle of cold-welding, cathodic stripping, and silica ingestion, industrial hardware must be re-engineered at the metallurgical and architectural levels.
Execution Protocol: Heavy-Duty Zinc Plating Maturation
* The Process: High-end metal garage rollers do not use raw carbon steel wheels. Instead, the entire wheel and stem assembly undergoes an industrial electro-galvanization (Zinc Plating) process, depositing a calibrated, uniform passivation layer.
* Material Expected Evolution: By coating the wheel in zinc, the direct iron-to-iron contact is eliminated. The softer zinc layer provides a solid-state lubricating effect, drastically reducing the interfacial shear strength required to move the wheel. This prevents the initial formation of micro-welds and drops the baseline COF below 0.3.
* Risk Mitigation: To prevent the zinc layer from wearing off too quickly, the electroplating process must strictly control the current density to ensure a tightly packed crystalline lattice, avoiding porous, low-adhesion plating that would easily flake off under heavy loads.
Execution Protocol: Sealed 10-Ball Bearing Matrices
* The Process: Upgrading from open-cage bearings to precision-machined, fully sealed 10-ball or 11-ball bearing cartridges. These utilize reinforced nitrile-rubber seals (2RS design) or metal shields (ZZ design) to encapsulate the internal kinematics.
* Material Expected Evolution: The physical barrier hermetically locks the high-temperature lithium grease inside the raceway while completely blocking the ingress of 1000 HB silica particulates.
* Result: Sub-surface spalling kinetics are halted entirely. The dynamic cycle life of the roller increases by over 400%, maintaining perfect rotational symmetry even in highly abrasive commercial warehouse environments.
| Performance Metric | Bare Steel Roller (Open Bearing) | Zinc-Plated Steel (Sealed Bearing) | ISO/ASTM Standard |
|---|---|---|---|
| Track Galling Risk | High (COF > 0.8) | Low (COF < 0.3) | ASTM G119 |
| Silica Ingestion Tolerance | Fails < 10,000 Cycles | Survives > 50,000 Cycles | ISO 15243 |
| Acoustic Output | > 85 dB (Grinding) | < 65 dB (Rolling) | Acoustic Audit |
| Cathodic Track Protection | Destroys track zinc | Preserves track zinc | ASTM B117 |

PRO-TIP / CHECKLIST
- The “Magnet” Silica Test: Run a strong neodymium magnet along the bottom of your tracks. If it picks up a mixture of dirt and metal shavings, your unsealed bearings have failed, and the rollers are actively milling your tracks.
- Verify the Zinc Hue: True zinc-plated rollers will have a distinct, uniform silver-blue or iridescent yellow hue. If the metal looks dull grey and porous, it is raw carbon steel and will initiate cold-welding immediately upon installation.
- Bearing Spin Audit: Before installation, pinch the stem and spin the wheel. A high-quality sealed 10-ball bearing should feel thick and smooth, stopping relatively quickly due to the grease packing. If it spins endlessly and rattles, it is a cheap open bearing that will fail rapidly.
- Check Stem Deflection: Apply lateral pressure to the wheel while holding the stem. If the wheel wobbles on the stem axis, the swaging process during manufacturing was flawed, which will cause asymmetric loading in the track.
- Audit for Red Rust: Inspect the lowest curve of your garage track. If red iron oxide is present, your previous rollers eradicated the cathodic shield. You must treat the rust before installing new plated rollers to prevent continuous abrasive wear.
- Match Track Gauge: Heavy-duty steel rollers should only be used in commercial 14-gauge or thicker tracks. Using solid steel rollers in thin residential 18-gauge tracks will quickly deform and widen the C-channel.
Часто задаваемые вопросы (FAQ)
how to install garage door opener
Installing an opener involves securing the power unit to ceiling joists using punched angle iron, connecting the T-rail to the header bracket above the door, and attaching the J-arm to the door’s center stile. Precision leveling is mandatory to prevent asymmetric lifting forces that can cause roller galling.
how to replace garage door opener
To replace an opener, first unplug the unit and detach the J-arm from the door. Support the motor with a ladder, unbolt the power head from the ceiling brackets, and remove the rail from the header. Always verify that the new opener’s horsepower matches the door’s weight specifications.
how to replace garage door rollers
Disconnect the opener and manually lower the door. Bend the track seam open slightly at a comfortable height. Unbolt the hinge holding the roller, angle it outward, slide the old roller out, insert the new 10 ball steel rollers replacement, reattach the hinge, and carefully bend the track seam back to perfect alignment.
how much is a 16×7 garage door installed
A standard 16×7 double-car garage door installation typically ranges from $1,200 to $2,500, depending on the material (steel, wood, or composite), insulation R-value, and whether heavy-duty components like zinc-plated steel rollers and 14-gauge hinges are requested by the homeowner.
how to pair garage door opener with car
Locate the “Learn” or “Program” button on the back of your opener motor head. Press it once, then immediately enter your vehicle and press the desired Homelink button on your rearview mirror or visor for three seconds. The opener lights will flash to confirm the encrypted radio frequency pairing.
how to realign garage door sensors
Loosen the wing nuts holding the photo-eye brackets to the vertical tracks. Ensure they are exactly the same height from the floor (usually 6 inches). Gently point the receiving sensor toward the sending sensor until the LED light stays completely solid without flickering, indicating a strong, uninterrupted infrared beam.