
Garage Door End Bearing Plate Deep Dive
Étalon de référence : Relevant material and performance testing standards include ASTM A123/A123M for zinc coatings on iron and steel products et ASTM B117 salt spray exposure practice as general references for galvanized steel behavior, not as catalog-specific claims.
Réponse courte
Garage door end bearing plates brackets are small components, but their failure behavior is rarely small. The catalog data identifies residential bearing brackets with 2.5mm thickness, industrial or heavier bearing brackets with 4.0mm thickness, bearing center distances including 67mm, 85 mm, and industrial options from 110mm to 185mm, all with a finition galvanisée. That data points to a practical engineering truth: the bracket must preserve bearing seat geometry while resisting plate distortion, hole-edge stress, surface abrasion, and moisture-driven corrosion.
For a buyer, installer, or hardware specifier, the wrong question is simply whether the bracket looks strong. The better question is whether the bearing seat stays predictable after stamping, bending, packaging, transport, installation, and repeated shaft rotation. That is where hole-edge quality, contact pressure, and pre-assembly inspection become more useful than generic strength claims.
From Stamped Blank To Bearing Seat: Edge Quality In A Garage Door End Bearing Plate Bracket
The first risk point appears before the bracket ever reaches the door. A galvanized steel bracket begins as a shaped plate, but the bearing seat is created through punching, forming, and finishing. When a 2.5mm residential bearing bracket uses a 67mm or 85mm bearing center distance, a small change in punched-hole edge condition can influence how the bearing shell contacts the plate. With a 4.0mm industrial bearing bracket, the plate is stiffer, but the punched edge also carries more seating force because the surrounding metal resists local deformation more strongly.
The mechanism is a contact-pressure problem. A bearing seated into a clean circular opening distributes load around a larger contact arc. If the punched edge contains burrs, uneven rollover, or a sharp cut boundary, the bearing does not sit against the plate as a uniform ring. Instead, load concentrates at local high spots. Under torsion shaft rotation, those high spots can become small pressure ridges. The bracket may still appear correct during visual inspection, but the bearing seat can begin to transmit vibration unevenly.
The catalog confirms galvanized finish across the relevant bracket series, so the cut edge deserves attention. Galvanized protection works as a surface system: the zinc layer protects the steel substrate, while the exposed steel edge is more sensitive to moisture and oxygen. A punched bearing-hole edge is different from a flat galvanized face because it is produced after sheet coating or during forming operations. If the cut edge is rough or rubbed during bearing insertion, the surface may become a starting point for oxidation in a damp garage.
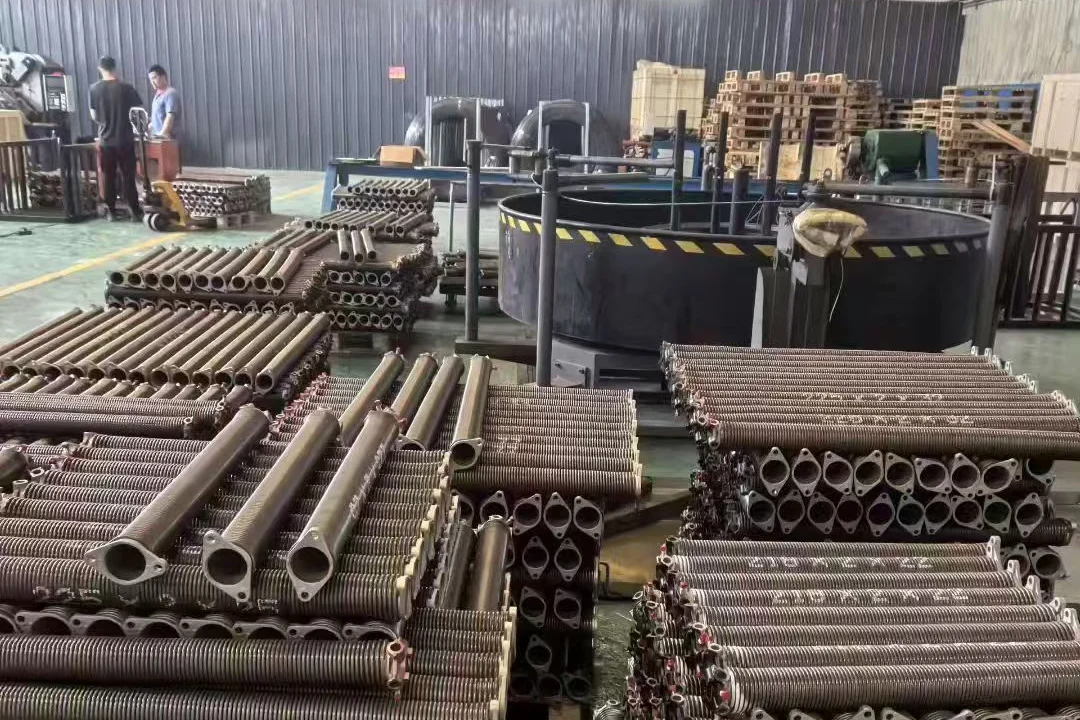
Extreme scenario model: consider a residential door using a 2.5mm bracket with an 85mm bearing center distance in a humid garage where the door cycles daily and condensation forms on cold metal. During the early stage, the punched edge only changes seating feel. During the middle stage, dust and zinc abrasion products collect around the bearing lip. During the high-stress stage, localized pressure and moisture can increase friction at the bearing seat, even before the bracket shows obvious deformation.
Cross-dimensional comparison test case: compare two brackets with the same 85mm bearing center distance and galvanized finish. Bracket A has a clean punched edge and sits flat during bearing insertion. Bracket B has uneven edge rollover. Both may pass a simple center-distance check, but Bracket B is more likely to create uneven seating pressure under shaft rotation. That difference is not about visible thickness; it is about the boundary condition between the bearing and the plate.
POINTS CLÉS À RETENIR
- A bearing that feels tight only at one side of the hole may indicate uneven punched-edge contact.
- Zinc scratches around the bearing seat can become moisture-sensitive points before full rust appears.
- A bracket that meets center distance on paper can still create uneven bearing pressure if the hole edge is rough.
The 2.5mm Versus 4.0mm Choice Is A Seating-Stability Decision
A common shortcut is to treat 4,0 mm as automatically better than 2,5 mm. That is not precise enough. The catalog shows residential bearing brackets at 2,5 mm, including versions with 67mm et 85 mm bearing center distance. It also lists multiple 4.0mm bearing brackets, including industrial bearing brackets with 85 mm, 110mm, 123mm, 148mm, et 185mm bearing center distance. The difference is not merely strength; it is how the plate behaves when bearing pressure, wall fastening, and shaft load meet at the same component.
A 2.5mm residential bracket can be suitable when the door system, shaft position, and bearing center distance match the intended hardware geometry. Its thinner plate can sit within tighter residential hardware layouts and may be easier to align during assembly. The risk appears when the door is heavier than expected, the bearing center is offset, or the mounting surface is not flat. In that condition, the plate can flex enough to change the local bearing contact pattern.
A 4.0mm industrial bracket resists bending more strongly, but that increased stiffness changes the way pressure is distributed. A thicker plate does not absorb small misalignment as easily. If the mounting plane is uneven or the bearing hole is not clean, a 4.0mm bracket may hold its shape while forcing the bearing to accept the mismatch. That can shift the problem from plate bending to bearing-seat pressure concentration.
| Specification point | Residential pattern | Industrial or heavier pattern | Practical seating implication |
|---|---|---|---|
| Plate thickness | 2,5 mm | 4,0 mm | Thinner plate may flex more; thicker plate holds geometry more firmly |
| Bearing center distance | 67mm, 85mm | 85mm, 110mm, 123mm, 148mm, 185mm | Larger spacing options support broader hardware layouts |
| Surface finish | Galvanisé | Galvanisé | Surface protection still depends on handling and edge condition |
| Inspection priority | Fit, flatness, hole edge | Hole position, bearing seating, plate plane | Different stiffness changes the failure signal |
Extreme scenario model: a 2.5mm residential bearing bracket installed on a slightly uneven surface may show early flex under repeated door movement. The first stage is minor contact shift. The middle stage is increasing shaft resistance. The late stage may be visible plate distortion near the bearing seat or fastener area. A 4.0mm bracket in the same surface condition may show less plate movement, but bearing contact pressure can rise faster because the plate refuses to conform.
Cross-dimensional comparison test case: use the same galvanized finish and the same 85mm bearing center distance. One bracket is 2,5 mm, the other 4,0 mm. Under a flat mounting plane and clean bearing hole, the 4.0mm bracket offers higher geometric stability. Under a distorted mounting plane, the stiffer bracket requires better installation control. The correct decision is not a strength contest; it is a seating-stability decision linked to application, wall condition, shaft alignment, and bearing fit.
For related hardware categories and broader garage door component context, Baoteng’s main hardware catalog can be explored through garage door hardware and bracket solutions.
Galvanized Surface Damage Usually Starts Before Installation
The galvanized finish listed for the relevant bracket series is important, but surface protection is not only an in-service issue. Damage often begins during manufacturing, bending, stacking, transport, or pre-installation handling. A bracket can leave the production line with the correct thickness and bearing center distance, yet still carry scratches at the bearing hole, folded corner, or package contact point.
Galvanized steel resists corrosion by placing a zinc-rich layer between the steel substrate and the environment. In a garage door bracket, the most exposed areas are not always the broad flat faces. The more sensitive zones are typically the punched hole edge, the outer radius of a bend, and the contact points where brackets rub against each other in a box. The catalog does not state zinc coating thickness or salt spray duration, so those values should not be invented. Still, the physical logic is clear: when zinc is scraped or cracked, moisture has a shorter route to the steel.
In a humid garage, condensation behaves differently from rain. It can remain in small crevices around the bearing seat and fastener holes. If the bracket is galvanized but the punched edge has been abraded during installation, the corrosion risk concentrates along the edge rather than across the flat surface. This is why surface inspection should happen before installation, not only during maintenance years later.
Extreme scenario model: imagine galvanized brackets packed tightly after stamping. During transport, the raised bearing-hole area rubs against another bracket. At first, only a bright scratch appears. After installation, that scratch sits near the bearing seat where dust and moisture collect. Over time, the combination of abrasion, oxygen, and condensation can create a small corrosion path. The bracket may remain structurally usable, but the bearing seat area becomes less predictable.
Cross-dimensional comparison test case: two 4.0mm industrial bearing brackets with the same 110mm to 185mm center-distance family are stored differently. One is separated during packaging; the other is stacked with direct metal-to-metal contact. Both have the same catalog thickness and galvanized finish, yet the second bracket has a higher chance of arriving with edge scratches. In procurement terms, surface handling is part of performance, not a cosmetic afterthought.
CONSEIL DE PRO / LISTE DE VÉRIFICATION
- Confirm whether the bracket is 2,5 mm ou 4,0 mm before judging load suitability.
- Check the bearing center distance against the intended shaft and bracket layout.
- Inspect the punched bearing hole for burrs, rollover, sharp edges, and zinc abrasion.
- Look at bend corners and packaging contact marks before installation.
- Reject brackets with visible exposed steel around the bearing seat when moisture exposure is expected.
- Test bearing seating feel before final fastening; uneven tightness can signal edge-contact problems.
- Recheck plate flatness after handling, especially on thinner residential brackets.
- Protect galvanized surfaces during storage instead of treating scratches as harmless cosmetic marks.
Pre-Assembly Bearing Seat Checks Should Read Contact Pressure
A useful QC process should not stop at hole position. The supplied data gives measurable inspection anchors: 67mm, 85 mm, 110mm, 123mm, 148mm, et 185mm bearing center distances; 2,5 mm et 4,0 mm thickness; and galvanized finish. These points are essential, but they do not fully describe whether the bearing sits evenly in the bracket.
A better pre-assembly check reads the contact behavior between the bearing and the seat. The inspector can confirm thickness, center distance, hole shape, burr condition, flatness, bend angle, galvanized appearance, and packaging damage. Then a simple assembly simulation can identify whether the bearing enters straight, contacts evenly, and remains seated without side bias. This does not require claiming a special proprietary device; it is a practical extension of mechanical inspection.
Four solutions make the process more reliable.
Solution 1: Thickness-class separation.
Execution protocol: separate 2.5mm residential brackets de 4.0mm industrial brackets before dimensional inspection. Do not allow mixed bins where an installer or assembler selects by appearance. Mark the inspection batch by thickness and bearing center distance.
Material behavior expectation: once thickness is controlled, the bracket group shows more consistent stiffness during bearing seating. That reduces random differences in local contact pressure.
Hidden cost and control: added sorting time can slow packing, but it prevents expensive mismatches between residential and industrial hardware.
Solution 2: Bearing center distance verification.
Execution protocol: measure the relevant center distance according to product type, including 67mm, 85 mm, and industrial distances such as 110mm, 123mm, 148mm, et 185mm. Pair dimensional checks with hole-edge observation.
Material behavior expectation: correct center distance reduces eccentric shaft loading and prevents the bracket from acting like a lever around the bearing seat.
Hidden cost and control: overchecking every unit may slow production; a balanced sampling plan can focus on first-piece, batch-change, and pre-packaging checks.
Solution 3: Punched-edge and burr review.
Execution protocol: inspect the bearing hole after punching and before final packing. Look for raised burrs, uneven rollover, rough cut zones, and zinc abrasion near the contact edge.
Material behavior expectation: a cleaner edge spreads bearing pressure more evenly and reduces micro-abrasion at the seat.
Hidden cost and control: aggressive deburring can remove protective surface material, so the process must remove sharpness without creating unnecessary bare steel exposure.
Solution 4: Galvanized surface and package-contact control.
Execution protocol: check flat surfaces, bend corners, bearing holes, and stack contact areas before packing. Use separation or orientation control where bracket-to-bracket rubbing is likely.
Material behavior expectation: reduced surface damage preserves corrosion resistance at sensitive locations, especially near edges and bends.
Hidden cost and control: better packaging increases material use, so it should be focused on bearing-seat zones and visible rub points rather than excessive full-product wrapping.
| QC variable | Applicable data anchor | Inspection method | Acceptance logic |
|---|---|---|---|
| Plate thickness | 2.5mm / 4.0mm | Thickness sampling | Match residential or industrial use class |
| Bearing center distance | 67mm / 85mm / 110-185mm | Dimensional measurement | Match bracket model and shaft layout |
| Bearing seat edge | Punched hole area | Contrôle visuel et de sécurité au toucher | No sharp burrs or uneven seating obstruction |
| Surface finish | Galvanisé | Visual inspection | No severe scratches, peeling, or exposed steel at critical points |
| Assembly behavior | Bearing inserted into seat | Pre-assembly simulation | Even seating without side-biased contact |
The most valuable inspection mindset is simple: measure the part, then read how it behaves when the bearing is actually seated. A bracket can meet a nominal number and still carry a hidden contact-pressure problem. The pre-assembly stage is the last low-cost chance to catch it.
Foire aux questions (FAQ)
How do you replace a garage door opener?
Replacing an opener is separate from replacing an end bearing plate. Before opener work, confirm the torsion shaft, bearings, and brackets are stable. If the shaft support is misaligned, a new opener may still struggle because mechanical resistance remains in the door hardware.
How to reset a Craftsman garage door opener?
Resetting the opener may clear control settings, but it will not correct bracket or bearing-seat friction. If the door moves unevenly after reset, disconnect the opener and check whether the door travels smoothly by hand before assuming the motor is the problem.
How to change battery in a LiftMaster garage door opener?
Battery replacement usually addresses backup power or remote operation. If the opener activates but the door resists movement, inspect the shaft support hardware, including end bearing brackets, before replacing more electrical parts.
How to seal a garage door?
Sealing reduces drafts and moisture entry, but hardware still needs inspection. In damp garages, galvanized brackets should be checked around punched holes, bend corners, and bearing seats because condensation can collect near edges and fastener points.
How to connect LiftMaster garage door opener?
Connect the opener only after confirming the door hardware moves without abnormal resistance. A bracket with poor bearing seating can increase opener load, affect travel limits, and make force adjustment less reliable.
How to reprogram a Genie garage door opener?
Reprogramming changes remote or travel control behavior, not mechanical alignment. If the opener loses smooth travel after programming, inspect the door balance, torsion shaft, bearings, and end bearing plate contact before changing more settings.
How do you program a Clicker garage door remote?
Programming a remote only controls signal pairing. If the remote works but the door hesitates, the issue may be mechanical rather than electronic. End bearing plates, shaft alignment, and bearing seating should be checked when resistance appears during travel.
 English
  Русский
  日本語
日本語  한국어
한국어  Français
  Deutsch
  العربية
  Português
  Español