Why Do Garage Door Angle Irons Bend and Rust Under Cyclic Load Stress?
Reference Standard: ASTM A653 / A653M (Standard Specification for Steel Sheet, Zinc-Coated by the Hot-Dip Process) and ASTM E8 / E8M (Standard Test Methods for Tension Testing of Metallic Materials).
Short Answer
The Physics of Load Distribution: Yield Strength in Industrial Settings
Understanding the mechanical failure of standard joint angle iron requires a deep dive into the microstructural degradation of carbon steel when subjected to dynamic, non-linear load paths. In heavy-duty commercial or high-humidity residential garage door systems, the hardware does not merely support static weight; it absorbs aggressive kinetic energy during every operational cycle.
When evaluating the structural integrity of these brackets, the thickness variable—specifically the leap from 2.0mm to 2.3mm, and ultimately to 2.5mm—dictates the elastic limit of the component. At a microscopic level, steel consists of a crystalline lattice structure. When a 2.0mm bracket absorbs the kinetic shock of a heavily insulated 16-foot door, the stress concentrations frequently exceed the material’s elastic region, pushing it into plastic deformation. The Young’s Modulus of the steel remains constant, but the reduced cross-sectional area of a 2.0mm profile means the stress (force per unit area) is significantly higher compared to a 2.5mm profile.
To map this degradation, engineers utilize a simulated extreme environment fatigue testing model. In the initial phase (Cycles 1 to 15,000), a standard 2.0mm bracket exhibits microscopic slip band formations within the ferrite grains. No visible bending occurs, but the atomic bonds are accumulating strain. During the secondary phase (Cycles 15,000 to 50,000), localized work hardening creates micro-voids at the grain boundaries, leading to macroscopic yielding. A visible deflection of 2 to 4 degrees becomes apparent along the primary axis of the joint angle iron. In the terminal phase (Cycles 50,000+), the bracket experiences catastrophic torsional buckling. The 2.5mm bracket, by contrast, reduces the localized stress by exponentially increasing the moment of inertia, thereby keeping the operational stress well within the elastic recovery zone indefinitely.
This primary deformation triggers a severe secondary cascade failure effect. As the angle iron brackets bend, the vertical and horizontal track alignment shifts. This misalignment forces the mechanical rollers to scrape aggressively against the track sidewalls, creating immense parasitic drag. The garage door opener motor must then draw excessive amperage to overcome this newly introduced friction, leading to premature thermal overload of the motor’s logic board and rapid stripping of the internal drive gears.
KEY TAKEAWAYS
- Acoustic Signatures of Yielding: High-pitched metallic popping sounds during the initial opening phase indicate that the bracket is shifting past its elastic limits and transferring shear force to the mounting bolts.
- Asymmetrical Track Deflection: A measurable variance greater than 3mm between the left and right vertical tracks signals that the angle iron has suffered permanent plastic deformation.
- Micro-Fissures at Bend Radii: The appearance of hairline cracks along the 90-degree fold of the bracket indicates localized work hardening and imminent structural shear failure.
Galvanization Diagnostics: Micro-level Molecular Defense
Rust is not merely an aesthetic issue; it is a violent electrochemical breakdown of the structural matrix. Bare steel in damp environments acts as an active anode, releasing electrons when exposed to moisture and oxygen, resulting in iron oxide. To combat this, industrial door bracket hardware utilizes advanced galvanization techniques, operating on the principle of cathodic protection.
Whether utilizing pre-galvanized coils or post-stamping hot-dip processes, the application of zinc creates a metallurgical bond with the steel substrate. Zinc possesses a highly negative electrochemical potential compared to iron. When condensation forms on the bracket, the zinc layer acts as a “sacrificial anode.” It willingly oxidizes, releasing electrons to the steel core and forcing the steel to remain the cathode. This process forms a dense, impenetrable layer of zinc carbonate that effectively halts further molecular degradation.
In rigorous ASTM B117 salt spray testing parameters, a standard untreated steel bracket exhibits severe red rust within 24 hours. A precision-engineered pre-galvanized bracket, however, can withstand 250 to 500 hours of continuous saline fog exposure before the zinc coating is fully consumed and base metal oxidation begins. This micro-level molecular defense is the absolute baseline requirement for any hardware deployed in coastal regions or unclimate-controlled warehouse facilities.
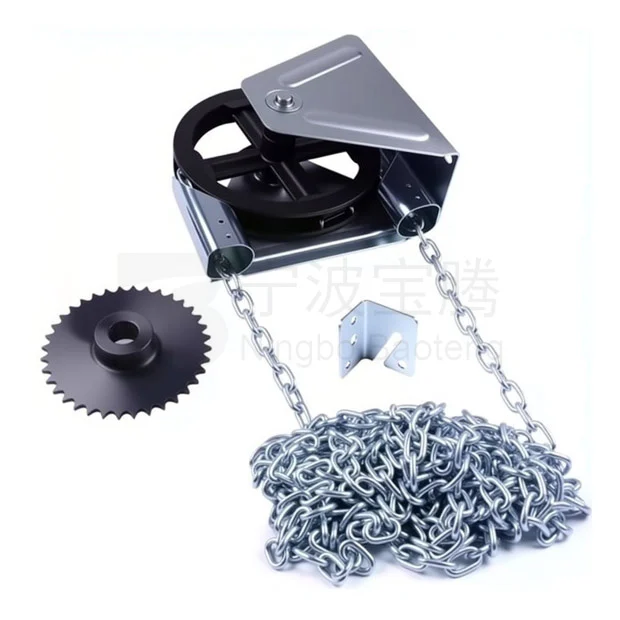
Geometric Alignment: The Blueprint of Flag-Shaped Configurations
Beyond material thickness and chemical defense, spatial geometry plays a pivotal role in hardware survivability. The flag-shaped joint angle iron, commonly deployed in 460mm and 530mm lengths, is engineered to manage complex multidirectional force vectors.
Standard multi-hole angle irons are versatile but often fail to properly manage torsional twist because their center of mass does not align optimally with the shear plane of the door track. A flag-shaped configuration acts as a specialized moment arm. By extending the anchoring geometry horizontally (the “flag” portion), it exponentially increases the bearing surface against the wall jamb. This specific blueprint dissipates the aggressive horizontal thrust generated when a heavy sectional door transitions from the vertical to the horizontal track radius. The 530mm variant provides a massive lever advantage, counteracting the pendulum effect of the door mass and ensuring the structural integrity of the entire track matrix remains uncompromised under extreme operational speeds.
Lifecycle Economic Matrix: TCO (Total Cost of Ownership) Breakdown
Procurement decisions driven solely by initial unit costs inevitably lead to exponential downstream liabilities. Evaluating angle iron brackets through a Total Cost of Ownership (TCO) lens reveals the hidden financial impact of hardware failure.
Solution 1: Deployment of 2.5mm Heavy-Duty Profiles
* Execution Protocol: Audit the entire structural load of the door system and mandate the replacement of all 2.0mm hardware with 2.5mm high-carbon steel brackets at all critical track junction points.
* Material Expected Evolution: The physical rigidity of the system will increase by an estimated 40%, completely eliminating sympathetic harmonic vibrations during door transit and preventing metal fatigue over a projected 15-year lifecycle.
* Hidden Costs & Side Effects Avoidance: The thicker steel marginally increases the overall weight of the track assembly. Installation technicians must use heavy-duty structural lag screws rather than standard fasteners to prevent wall anchor pull-out.
Solution 2: Mandating Pre-Galvanized Electrochemical Barriers
* Execution Protocol: Specify that all brackets must be cut from pre-galvanized steel coils, ensuring a uniform zinc distribution of at least G60 (0.60 ounces of zinc per square foot).
* Material Expected Evolution: The bracket surface will slowly dull over a decade as the zinc sacrifices itself to environmental moisture, forming a highly stable, protective zinc-oxide patina that prevents structural rust flaking.
* Hidden Costs & Side Effects Avoidance: Cutting pre-galvanized steel leaves the immediate sheared edges exposed. Ensure the factory application includes an inhibitor spray on cut edges, or keep environments adequately ventilated to slow edge oxidation.
Solution 3: Flag-Shaped Geometric Anchoring
* Execution Protocol: Install 530mm flag-shaped brackets specifically at the critical top-radius junction where the vertical track curves into the horizontal plane.
* Material Expected Evolution: The widened anchor footprint will permanently distribute the centrifugal kinetic force of the door, completely halting the gradual outward bowing of the vertical tracks.
* Hidden Costs & Side Effects Avoidance: Flag brackets require a wider mounting jamb. Facility managers must ensure the timber or steel jambs are wide enough to accommodate the extended fastening footprint without edge-splitting.
Solution 4: Precision Tolerance Calibration
* Execution Protocol: Implement a strict QC process utilizing digital calipers to ensure all bolt slots and mounting holes are stamped within a 0.1mm tolerance, preventing hardware slop.
* Material Expected Evolution: Micro-movements between bolted connections will be eliminated. The hardware will operate as a monolithic structure, severely reducing metal-on-metal wear and tear.
* Hidden Costs & Side Effects Avoidance: Tight tolerances mean zero margin for error during installation. Technicians must use laser levels; brute-force track alignment will no longer be possible.
| Material Configuration | Yield Threshold (Stress) | Salt Spray Resistance | 10-Year TCO Impact |
|---|---|---|---|
| 2.0mm Bare Carbon Steel | Low (< 250 MPa) | < 24 Hours | Critical (High Replacement Cost) |
| 2.0mm Pre-Galvanized | Low (< 250 MPa) | 250+ Hours | Moderate (Bending Failures) |
| 2.3mm Pre-Galvanized | Medium (~ 300 MPa) | 250+ Hours | Low (Standard Reliability) |
| 2.5mm Pre-Galvanized | Extreme (> 350 MPa) | 250+ Hours | Optimal (Near-Zero Maintenance) |
| 2.5mm Hot-Dip Galvanized | Extreme (> 350 MPa) | 500+ Hours | Ultimate (Harsh Chemical Zones) |
PRO-TIP / CHECKLIST
- Caliper Verification: Always independently verify the bracket thickness; 2.0mm hardware is frequently mislabeled as heavy-duty by unauthorized suppliers.
- Galvanization Scratch Test: Deeply scratch an inconspicuous area of the bracket. If it rusts within 48 hours in a humid environment, the zinc coating is compromised or fake.
- Acoustic Tap Test: Strike the bracket with a wrench. A high, ringing pitch indicates dense, high-yield steel; a dull thud may suggest inferior alloys or micro-fractures.
- Radius Inspection: Examine the 90-degree bend. Ensure the stamping process has not thinned the metal at the curve, which acts as a primary failure point.
- Slot De-burring: Run a gloved finger along the stamped bolt slots. They must be completely deburred to prevent scoring the protective zinc off the mounting bolts.
- Torque Specification: Never use impact drivers to secure the brackets. Use a manual torque wrench to prevent crushing the steel matrix around the fastener.
자주 묻는 질문(FAQ)
how to reset garage door code
To reset the garage door code, locate the “Learn” button on the back panel of the overhead motor unit. Press and hold this button until the LED indicator light turns off (typically 6 seconds). This action erases all previous codes from the logic board’s memory.
how to sync remote to garage door
Press and release the “Learn” button on the motor unit; the indicator LED will glow steadily. Within 30 seconds, press and hold the button on your remote control. Release the remote button when the motor unit lights blink or two clicks are heard, confirming synchronization.
how do you program a garage door remote
Ensure the remote has a fresh battery. Access the overhead motor and press the “Learn” button once. Immediately press the desired button on your remote control. The system will flash its lights to verify the radio frequency has been securely logged into the receiver’s memory.