
Center Bearing Bracket Load Path Guide
Reference Standard: Relevant material and performance testing standards, including zinc-coated hardware inspection principles such as ASTM A153 and comparative corrosion test methods such as ISO 9227 when specified by the buyer or project document. These references are mentioned as general testing frameworks, not as claimed certifications for this catalog item.
Short Answer
Garage Door Center Bearing Bracket as the Quiet Reference Point
The first function of a garage door center bearing bracket is not visual strength. Its deeper role is positional discipline. In a sectional garage door torsion system, the center bracket sits at the central fixing area where spring force, wall reaction, shaft alignment, and repeated door cycling all meet. The catalog identifies the relevant product as a Spring Center Bracket, BT-B232, in the Bracket series, with 2.5mm thickness and galvanized finish. That small data set is enough to define the practical reading of the part: it is a galvanized sheet-metal bracket used as a central spring support, but the catalog does not provide a bearing size, exact hole layout, material grade, load capacity, or rated door weight.
The key information gain comes from treating the bracket as a reference point. A reference point does not need to move, but every nearby part depends on its stability. When a torsion spring rotates, the spring does not only create rotational energy; it also imposes small cyclic reactions into the mounting structure. If the central support face is uneven, if fasteners are tightened against a distorted surface, or if the bracket is installed with a slight skew, the spring axis may still look acceptable at rest while behaving differently under motion. That difference is where noise, friction, and uneven force transfer begin.
A useful edge-case model is a damp garage with repeated morning temperature changes. Moist air condenses on metal surfaces, dust collects at the bracket face, and the door cycles under changing spring temperature and lubricant condition. In the early phase, the bracket may show no visible issue. In the middle phase, vibration can polish contact points around holes or bent edges. In the high-stress phase, a small installation offset may become easier to hear than to see: the door may operate with a sharper metallic resonance around the spring line.
A cross-dimensional comparison test can separate reference stability from appearance quality. Compare two sample installations using the same 2.5mm galvanized Spring Center Bracket: one mounted on a flat, rigid wall surface with evenly seated fasteners, and one mounted over a slightly uneven surface with one fastener carrying more clamp load than the others. The two brackets may look identical after installation, but the second setup concentrates stress around fewer contact points. That condition does not prove immediate failure, yet it increases the chance of vibration transfer, fastener loosening, and surface wear around high-contact edges.
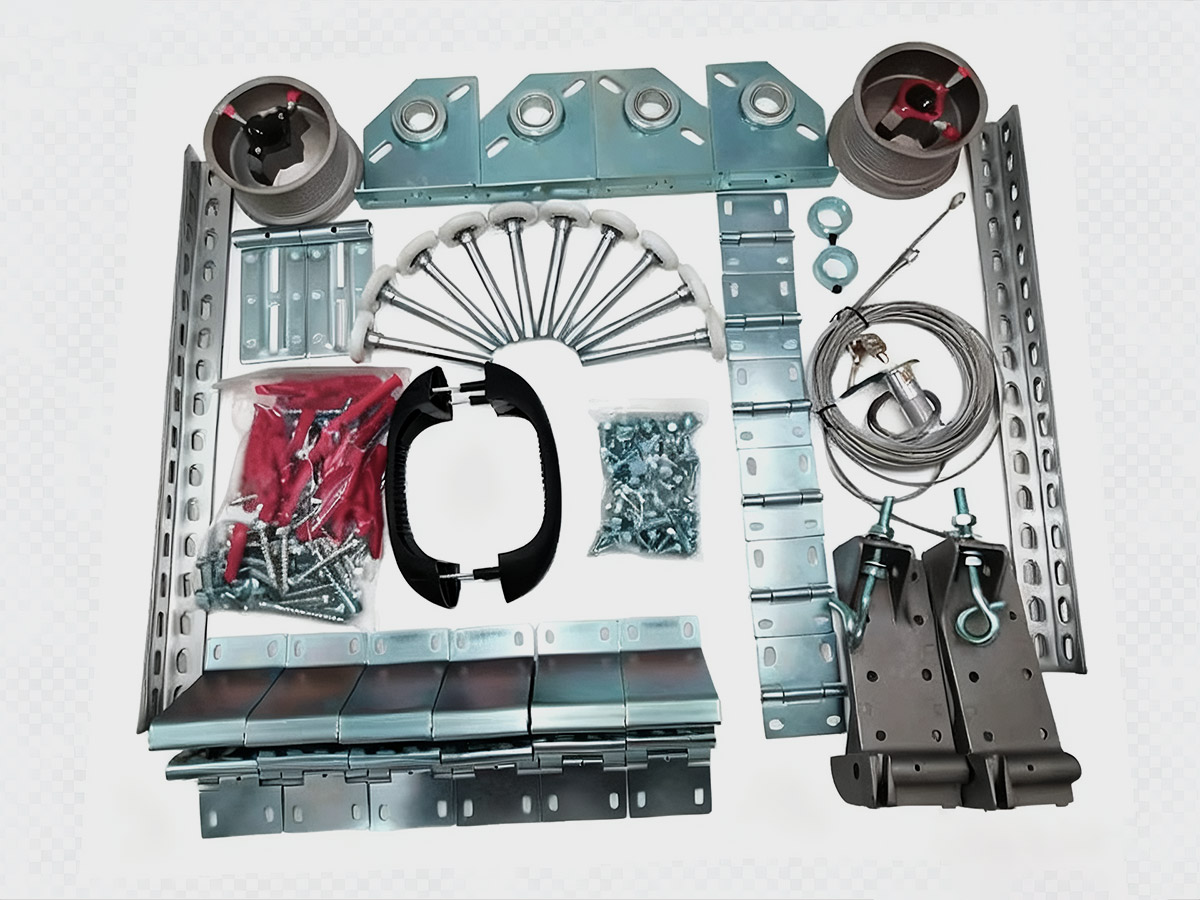
For procurement or installation teams, this means the bracket should be read through its system position. The safe wording is not “this bracket supports any door size,” because the catalog does not state that. The accurate wording is that the listed Spring Center Bracket is a 2.5mm galvanized bracket-series component intended for the central spring support area of sectional garage door hardware. For related hardware context, the manufacturer website can be referenced through garage door hardware components without adding unsupported specifications.
A 2.5mm Galvanized Plate as a Boundary Condition
A 2.5mm galvanized plate is not merely a specification line; it is a boundary condition for how the part should be handled, installed, inspected, and compared. Thickness affects bending resistance, local stiffness around holes, and the way clamp pressure spreads across the bracket face. Galvanized finish affects surface protection, especially where moisture, handling scratches, and edge wear may expose vulnerable areas. The catalog only states Thickness: 2.5mm and Finish: Galvanized, so any discussion must stay inside that factual boundary.
Mechanically, a 2.5mm bracket should be evaluated at four stress zones: the main mounting face, the fastener holes, the bent or formed edges, and the contact region near the spring support line. A plate does not deform uniformly under real installation loads. It reacts first at geometry interruptions. Holes reduce continuous material area, bends create local hardening and stress concentration, and clamp pressure can create point loading if the wall surface is uneven. The bracket may not visibly bend under a single installation action, but repeated door cycles can make minor contact asymmetry more important over time.
From a surface perspective, galvanizing is normally used to improve corrosion resistance by providing a zinc-based protective layer. The precise coating thickness is not listed, so the correct technical statement is only that the part has a galvanized finish. In a humid garage, the protective value of this finish depends on continuity. A clean, continuous surface is more resilient than a scratched or burr-heavy edge because exposed base metal is more vulnerable in the presence of oxygen and moisture. This is a general electrochemical principle, not a claim about a specific salt spray duration.
A practical extreme-environment model would involve three phases. In the initial phase, installation scratches and fastener marks define the first weak surface areas. In the middle phase, cyclic vibration can enlarge polished contact marks around holes or bracket edges. In the limit phase, if moisture is present and the galvanized surface is already damaged, corrosion may begin at exposed edges or contact scars. This does not mean every bracket will corrode quickly. It means that surface continuity and installation care influence the real service environment of any galvanized bracket.
A useful comparison case is a dry interior garage versus a coastal or frequently wet garage. Both may use the same BT-B232 2.5mm galvanized Spring Center Bracket. The dry installation mainly tests mechanical seating and vibration behavior. The wet or salt-laden environment adds surface durability pressure, especially at cut edges, holes, or scratched areas. Since the catalog does not provide coating mass or corrosion test duration, the buyer should request project-specific test data if corrosion exposure is a major requirement.
| Evaluation variable | Low-risk condition | Higher-risk condition | Practical reading |
|---|---|---|---|
| Plate thickness | Cataloged as 2.5mm and verified by measurement | Thickness not checked before batch acceptance | Thickness verification protects specification consistency |
| Surface finish | Galvanized surface appears continuous | Scratches, rust spots, peeling, or exposed edges | Surface continuity matters in humid environments |
| Mounting face | Flat contact with wall or support surface | Uneven base creates point loading | Fastener load may concentrate locally |
| Hole condition | Clean hole edges with minimal burrs | Burrs or distortion around punched holes | Burrs can affect seating and stress distribution |
| Alignment condition | Bracket supports central spring line cleanly | Bracket is skewed during installation | Misalignment can create friction and noise risk |
From Wall Fastening to Spring Rotation: Hidden Load Path
The center bracket load path begins at the wall or header surface, not at the bracket alone. A fastener clamps the galvanized bracket to the mounting structure. The bracket spreads that clamp force through a 2.5mm plate body. The plate geometry then holds the spring center area in position while the torsion spring cycles. Each stage influences the next stage. If the wall surface is uneven, clamp force may not distribute cleanly. If the bracket face is not flat, the spring line may be slightly biased. If the spring line is biased, the rotating system can create additional friction or audible vibration.
This load-path view avoids a common mistake: judging the bracket only by product appearance. A clean galvanized bracket can still be poorly installed. A well-made bracket can still be misused if the supporting structure is weak, the fastener type is wrong, or the installer does not confirm alignment. Since the catalog does not state a rated load, the bracket should not be described as suitable for every sectional door. The correct approach is to match the bracket with the door system design, spring layout, fastener specification, and installation surface.
The edge-case fatigue model here is a high-cycle residential or light commercial door that opens many times per day. In the first stage, the bracket behaves as a rigid locating part. In the second stage, tiny vibration marks may appear around fastener contact areas. In the third stage, if one fastening point carries too much load, local movement can polish the galvanized surface, reduce clamp stability, and create a path for loosening. This is not a claim about a measured cycle rating; it is a physical model of how repeated vibration can transform a small installation error into a larger maintenance issue.
A cross-system comparison can be made between two load paths. In a balanced path, wall support, fastener preload, bracket flatness, and spring axis work together. In an unbalanced path, a small wall irregularity shifts load into one side of the bracket. The same Spring Center Bracket BT-B232 then experiences a different local stress map even though the component is unchanged. The real difference is not the catalog part but the surrounding system.
KEY TAKEAWAYS
- Bright polished marks around mounting holes can signal small movement before visible deformation appears.
- Uneven fastening pressure can make a flat galvanized bracket behave like a locally overloaded part.
- Noise near the spring line should trigger alignment and fastener checks before replacing unrelated hardware.
Inspection Logic Before Installation
Inspection should be treated as a risk gate before installation, not as a decorative checklist after problems appear. The catalog does not provide a proprietary QC standard for this Spring Center Bracket, so the practical inspection logic must rely on general objective garage door hardware checks: thickness confirmation, surface review, hole cleanliness, bend consistency, flatness, and installation alignment.
Solution 1: Verify plate thickness and visible geometry.
Execution protocol: Confirm that the bracket corresponds to the cataloged BT-B232 Spring Center Bracket and check the stated 2.5mm thickness using an appropriate measuring tool on accessible plate areas. Review the bracket shape against the intended installation position before fastening. Do not infer compatibility from appearance alone.
Expected material behavior: A consistent 2.5mm plate should distribute clamp load more predictably than a visibly inconsistent plate. The goal is not to assign a new load rating but to reduce variability in stiffness and seating.
Hidden cost and prevention: Over-checking every single part may slow receiving inspection. A practical approach is batch sampling plus full visual inspection for surface and geometry defects.
Solution 2: Inspect the galvanized surface before handling damage is added.
Execution protocol: Examine the surface for obvious rust, peeling, deep scratches, or missing coating. Pay attention to holes, edges, and formed areas because these locations often see more handling contact and stress.
Expected material behavior: A continuous galvanized surface is more likely to resist ordinary indoor humidity than a damaged surface with exposed metal.
Hidden cost and prevention: Rejecting every small handling mark may be unrealistic. Separate cosmetic marks from deep exposure, edge damage, or corrosion evidence.
Solution 3: Control hole edge cleanliness and seating contact.
Execution protocol: Check holes for burrs, distortion, sharp projections, or debris before installation. Fasteners should seat cleanly without being forced across raised burrs that change clamp pressure.
Expected material behavior: Cleaner hole edges reduce point stress and improve fastening repeatability. This supports stable alignment under repeated door movement.
Hidden cost and prevention: Excessive deburring after galvanizing may damage the protective surface. Use controlled finishing methods and inspect the exposed edge condition afterward.
Solution 4: Validate alignment during installation, not after noise appears.
Execution protocol: Before final tightening, position the bracket so the central spring line can remain straight and stable under expected operation. Tighten progressively rather than forcing one side first.
Expected material behavior: Balanced tightening reduces plate twist and lowers the risk of stress concentration around one fastener zone.
Hidden cost and prevention: Field installers may rush alignment to save time. A simple pre-close alignment check is cheaper than diagnosing vibration after the door is fully assembled.
| Inspection item | Acceptance logic | Risk if ignored | Practical test method |
|---|---|---|---|
| Thickness | Must match the cataloged 2.5mm reference | Unknown stiffness variation | Caliper check on accessible plate area |
| Galvanized finish | Surface should be continuous and clean | Higher corrosion risk at damaged areas | Visual inspection under good lighting |
| Hole edges | Burrs and distortion should be controlled | Fastener seating may become uneven | Touch check and visual hole review |
| Flatness | Mounting face should sit without obvious rocking | Clamp load may concentrate locally | Dry-fit against the mounting surface |
| Alignment | Spring center line should not be forced off-axis | Noise, friction, or vibration may increase | Trial positioning before final tightening |
PRO-TIP / CHECKLIST
- Confirm the part is the Spring Center Bracket, model BT-B232, before mixing it with other bracket-series items.
- Measure the plate only against the stated 2.5mm catalog reference; do not invent load ratings from thickness alone.
- Inspect galvanized surfaces before installation scratches make root-cause review difficult.
- Check hole edges for burrs that can alter fastener seating pressure.
- Dry-fit the bracket against the mounting surface to identify rocking or uneven contact.
- Tighten fasteners progressively so the bracket face is not pulled into a twisted position.
- Recheck the spring line after initial placement and before full system operation.
- Request project-specific corrosion or performance test data if the installation site is unusually wet or chemically aggressive.
Frequently Asked Questions (FAQ)
How to measure garage door springs?
Measure spring length, inside diameter, wire size, and wind direction only when the spring is fully safe to inspect. Torsion springs store dangerous energy, so homeowners should avoid loosening hardware without training. For bracket selection, spring layout and center support position matter more than guessing from door size alone.
How much is it to replace a garage door?
Replacement cost depends on door size, panel type, spring system, opener setup, labor, and local service rates. A center spring bracket is only one hardware element. If the bracket area shows vibration, rust, or alignment issues, ask the technician to inspect the spring center line before quoting unrelated parts.
How to lock garage door?
A sectional garage door can be locked through a manual slide lock, opener lock mode, or compatible security accessory depending on the system. Do not add locking force near the spring bracket area. The center bracket supports spring alignment and should not be modified to act as a lock point.
How to open garage door opener?
Most openers use a wall button, remote, keypad, or emergency release cord. If the door is hard to lift after release, do not blame the opener first. Spring balance, track condition, and central support alignment should be checked because mechanical resistance can overload opener behavior.
How to program LiftMaster keypad for garage door opener?
Programming usually requires the opener learn button and the keypad PIN sequence specified by the opener manual. The keypad does not affect the center bearing bracket directly. If the door responds but moves roughly, inspect mechanical hardware separately instead of reprogramming the keypad repeatedly.
How to replace a garage door opener battery?
Open the battery compartment, match the battery type specified by the opener or remote manufacturer, replace it with correct polarity, and test operation. Battery replacement will not fix vibration, grinding, or spring-line noise. Those symptoms require mechanical inspection near brackets, rollers, tracks, and springs.
 English
  Русский
  日本語
日本語  한국어
한국어  Français
  Deutsch
  العربية
  Português
  Español