
Garage Door Bottom Lift Bracket Testing Guide
Reference Standard: Relevant material and performance testing standards include ASTM A123/A123M for zinc coating on iron and steel products and general dimensional inspection practices aligned with ISO technical standards principles.
Short Answer
Why the Lowest Door Corner Becomes the First Mechanical Truth-Teller
The lowest corner of a sectional garage door is where several mechanical signals arrive at the same time: door panel weight, cable pull direction, roller guidance, floor moisture exposure, and fastener compression. That makes the garage door bottom lift bracket a useful diagnostic point. A door may look aligned at the center panel, but the lower corner often reveals early mechanical imbalance through ovalized holes, shiny rub marks, uneven fastener pressure, or a bracket that no longer sits flat against the door stile.
Known product data gives the article its hard boundary. The cataloged range includes 2.5mm galvanized bottom brackets, 4.0mm galvanized bottom brackets, 4.0mm aluminum bottom brackets, and safe bottom bracket versions for 2″ track and 3″ track systems using an 11mm roller shaft. These figures are not decorative. They define how much plate section is available to resist local bending, how much contact area is available around punched holes, and how precisely the bracket must cooperate with the track and roller system.
At the beginning of service, a properly selected lower bracket behaves like a fixed reference point. The fastener heads clamp the plate, the roller shaft runs in line with the track, and the cable pull remains close to its intended direction. In the middle stage of use, small deviations become visible at this corner before they appear elsewhere. A 2″ track system using a bracket intended for a different geometry may not fail immediately, but it can introduce a lateral bias that increases friction during door travel. A 3″ track system has a different spatial relationship between the door edge and roller path, so the wrong lower hardware can change the way the door corner enters the vertical track.
An edge-case fatigue model can be described without inventing load ratings. In a damp garage with repeated open-close cycles, the lower corner receives a repeating sequence: cable tension rises, the panel begins to move, the roller shaft stabilizes the path, and the bracket plate transfers local force into the door structure. During the initial stage, the bracket may only show bright contact marks around fasteners. During the middle stage, tiny shifts can create asymmetric pressure near holes. At the extreme stage, the plate may show visible distortion, fastener loosening, or corrosion at exposed marks if the galvanized finish has been damaged.
A cross-dimensional comparison test helps reveal the difference between superficial fit and mechanical fit. Place a 2.5mm galvanized bracket, a 4.0mm galvanized bracket, and a 4.0mm aluminum bottom bracket into the same inspection logic. The test is not about declaring one universally superior. It is about observing how each plate responds to fastener clamping, edge pressure, and lower-corner alignment. The 2.5mm option can be suitable where the door system matches its intended duty, while the 4.0mm options provide more plate section for resisting local deformation. The aluminum version changes the material response again, so it should be considered through actual bracket geometry and application conditions rather than assumed interchangeability.
KEY TAKEAWAYS
- A lower corner that develops shiny hole edges before other panels show wear may be exposing cable or track bias.
- A bracket that fits the door but not the 2″ or 3″ track geometry can still create uneven roller guidance.
- Any scratched galvanized area near the lower edge should be monitored because wet floors increase exposure frequency.
A Thickness Conversation Between Fastener Pressure and Corner Plate Memory
Thickness is often treated as a catalog number, but for a bottom lift bracket it acts more like the plate’s memory under repeated compression. A 2.5mm galvanized bottom bracket and a 4.0mm galvanized bottom bracket do not only differ in numerical section. They respond differently when fasteners press into the plate, when the cable load changes direction, and when the punched holes experience repeated bearing contact. The 4.0mm aluminum bottom bracket adds another layer of interpretation because material type changes how the plate stores and releases deformation.
When a fastener is tightened, the plate is compressed between the fastener head and the door structure. In a perfectly controlled condition, the load spreads evenly. In real service, the bottom corner may not be perfectly flat, the door stile may have slight surface variation, and the bracket may also experience small twisting moments during travel. A thinner plate can still function correctly when the application is appropriate, but it has less section available to resist local indentation and hole-edge deformation. A thicker plate generally offers more resistance to visible bending, although exact performance depends on geometry, material, fastener pattern, and installation quality.
The edge-case model here is a high-moisture, high-cycle lower corner with intermittent impact from door closing. In the initial stage, a bracket may show only shallow witness marks around the screw or bolt contact areas. In the middle stage, repeated compression can create a slight seating pattern, especially if the fasteners were not uniformly tightened. In the extreme stage, plate memory becomes visible: the bracket may retain a bent shape after the door is unloaded, or the hole perimeter may no longer maintain its original geometry. These observations do not require invented strength values; they are grounded in basic mechanics of plate bending, bearing pressure, and repeated clamping.
A cross-test should compare three behaviors: fastener seating, hole-edge shape, and bracket flatness after removal. The 2.5mm galvanized steel category should be checked for whether the hole edge stays circular and whether the bracket remains flush. The 4.0mm galvanized category should be checked for how the thicker plate distributes fastener compression and whether it resists visible corner flex. The 4.0mm aluminum category should be checked separately, because aluminum changes corrosion behavior and deformation response compared with galvanized steel.
| Inspection Variable | 2.5mm Galvanized Bracket | 4.0mm Galvanized Bracket | 4.0mm Aluminum Bracket |
|---|---|---|---|
| Fastener pressure response | Requires careful seating control | More plate section against local compression | Material response differs from steel |
| Hole-edge bearing behavior | More sensitive to local pressure | Better section depth around holes | Must be judged by actual hole geometry |
| Wet lower-corner exposure | Galvanized finish helps protect steel | Galvanized finish helps protect thicker steel section | Aluminum changes corrosion pathway |
| Repeated cycle observation | Watch for early ovalization | Watch for fit and surface damage | Watch for material-specific deformation |
| Best validation method | Thickness, hole, and fit inspection | Flatness and fastening inspection | Separate material and geometry review |
A useful procurement approach is to avoid asking only whether a bracket is “heavy duty.” A better question is: under the same door geometry, does the bracket keep its flatness, hole shape, and fastener seating after repeated lower-corner load transfer? That question connects catalog data with real mechanical behavior.
When Cable Pull Direction Turns a Bracket into a Bearing Surface
Cable direction can turn a bottom bracket from a passive mounting plate into an active bearing surface. The cable does not simply lift the door; it introduces a force path that moves through the lower corner hardware, fasteners, bracket folds, roller shaft relationship, and track alignment. When that force path is clean, the bracket shares load through its intended surfaces. When the cable angle drifts, the bracket may receive more pressure on one side of a hole, one edge of a fold, or one fastener group.
This is the unused knowledge gap that matters for the current product: lower corner cable angle and fastener bearing pressure. It is not the same as a generic installation mistake. A bracket can be installed in the correct visible location and still experience poor pressure distribution if the cable pull direction, track spacing, and roller shaft centerline do not cooperate. The known product data gives the anchor points: safe bottom bracket versions exist for 2″ track and 3″ track systems, and the compatible roller shaft is 11mm. These dimensions imply that the bracket is part of a geometry chain, not a standalone replacement part.
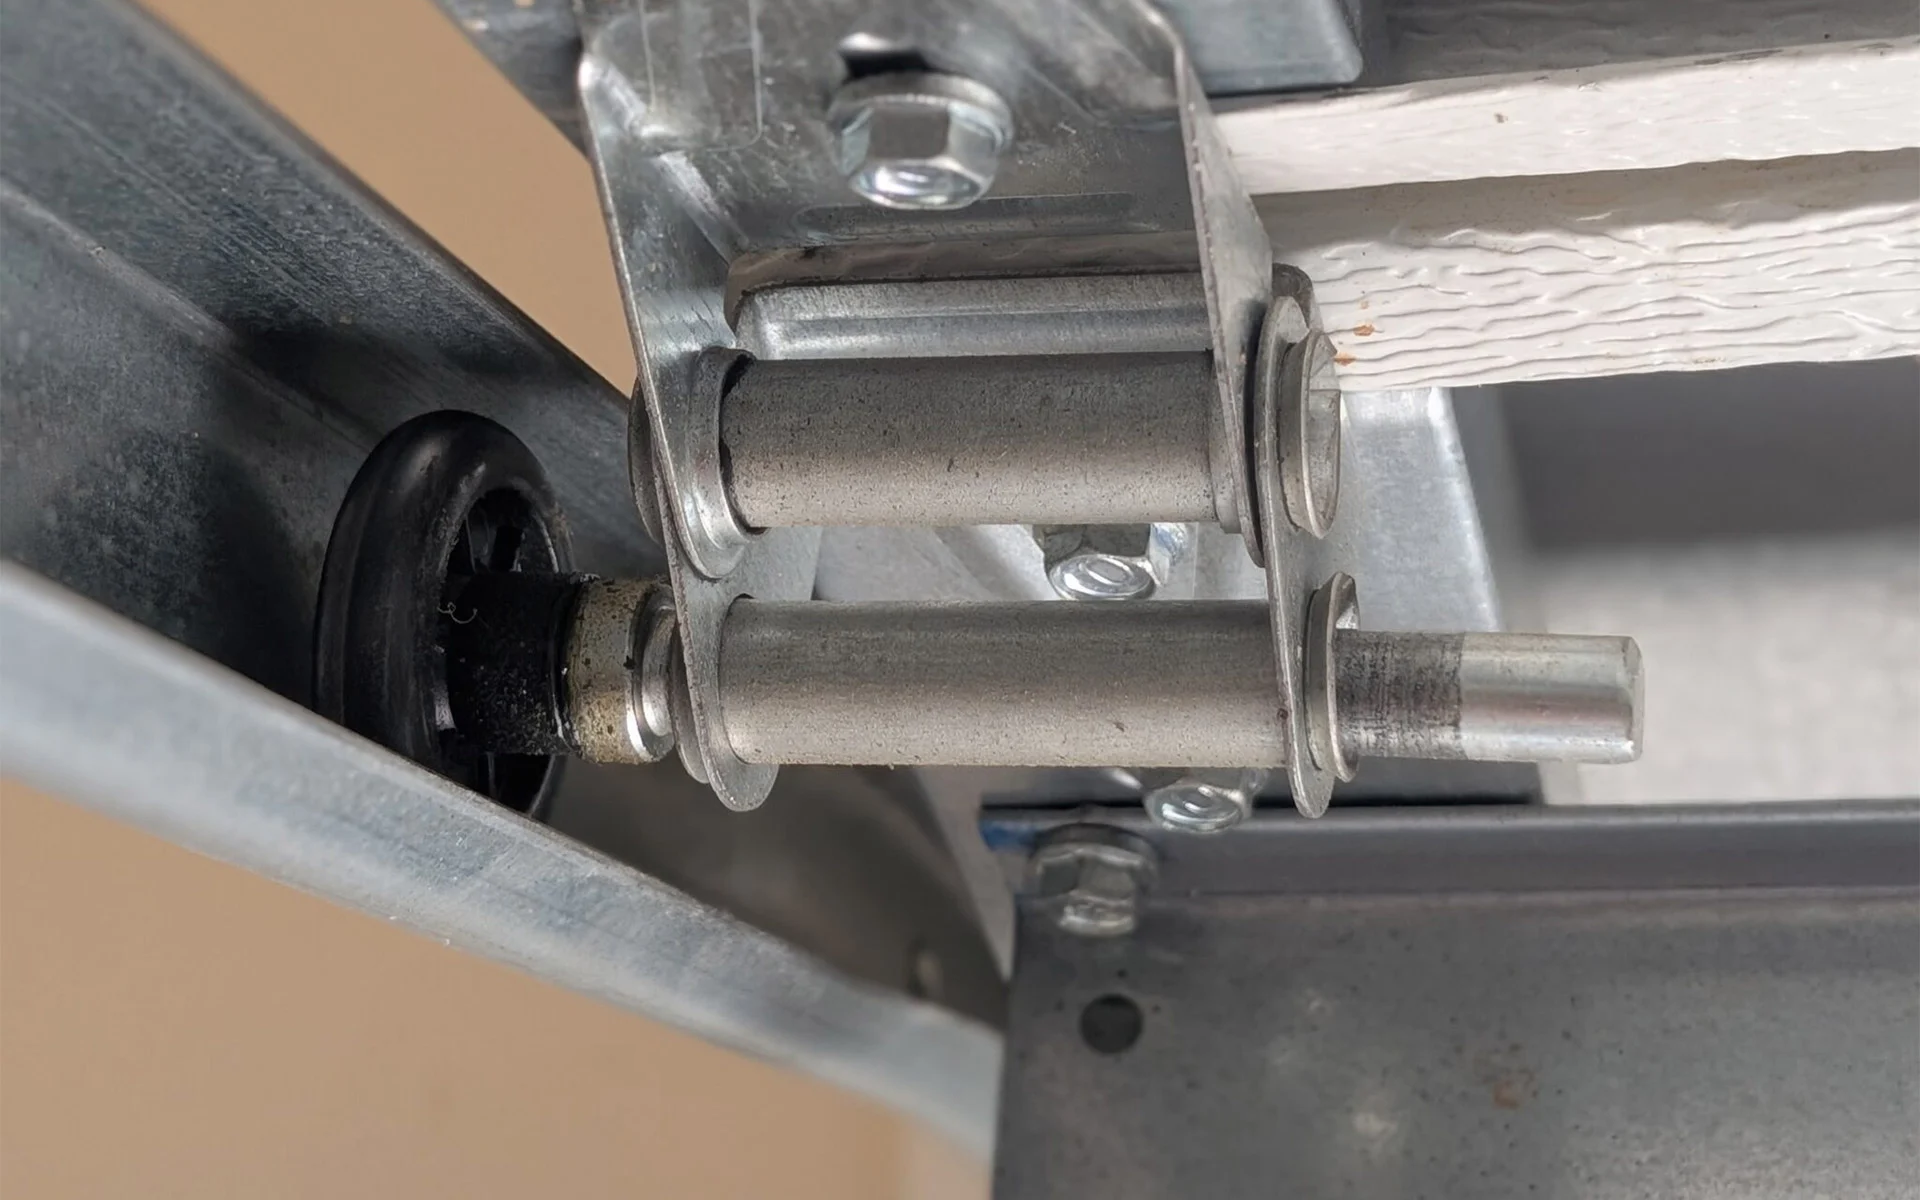
A practical pressure timeline begins with alignment. In the initial phase, the cable pulls through the intended lower-corner path and the fasteners mainly provide clamping support. In the middle phase, if the cable angle is slightly offset, one side of a hole begins to act as a bearing boundary. This can create polished areas, localized fretting marks, or tiny shifts in fastener preload. In the extreme phase, the bracket may show directional deformation: not random bending, but a distortion pattern that points back toward the force path. A technician who only replaces the bracket without reviewing cable direction may repeat the same wear pattern.
A cross-dimensional test compares static fit with force-path fit. Static fit asks whether the bracket can be bolted on and whether the roller shaft enters the track. Force-path fit asks whether the 11mm roller shaft, cable attachment area, and 2″ or 3″ track geometry remain aligned during movement. These are different questions. Static fit can pass while force-path fit fails over time. For an engineered inspection, the door should be moved slowly through the lower travel range while the bracket is observed for cable rubbing, fastener movement, and roller bias.
PRO-TIP / CHECKLIST
- Confirm whether the system uses a 2″ track or 3″ track before selecting the lower bracket.
- Check that the roller shaft requirement matches the 11mm roller shaft specification.
- Inspect whether the cable pulls straight through the lower corner without side rubbing.
- Look for polished marks around bracket holes, which may indicate directional bearing pressure.
- Verify that the bracket sits flat before final tightening.
- Compare adjustable and unadjustable versions by actual door geometry, not by visual similarity.
- Recheck fastener seating after a short movement test.
Galvanized Surface Is Not Decoration; It Is the Boundary Between Wet Floors and Steel Exposure
The bottom bracket lives closer to water than most upper door hardware. It sees wet concrete, condensation, vehicle splash, rain carried under the door, cleaning water, and sometimes road residue. That is why a galvanized or galvanized steel finish has practical value. It is not a cosmetic shine. It is a surface boundary intended to slow direct exposure of steel to moisture and oxygen.
This section avoids making an unrealistic corrosion promise. A galvanized finish improves resistance, but it does not make the bracket immune to damage. If the surface is deeply scratched, if the edge is abused during installation, or if wet debris remains trapped near the lower corner, corrosion can begin at the compromised area. The important procurement question is not whether the bracket looks bright on delivery. The question is whether the coating is continuous, whether the surface is free from obvious peeling or severe scratches, and whether the installed bracket avoids unnecessary contact points where moisture can remain.
The edge-case exposure model is a garage where the bottom seal area frequently stays damp. In the initial stage, the bracket may remain visually stable while water evaporates from the surface. In the middle stage, small scratches can become darker because the protective surface has been interrupted. In the extreme stage, corrosion may develop around damaged zones, and that corrosion can change the local contact condition around fasteners. It is still wrong to invent a salt-spray duration when no such catalog data is provided. A responsible specification should request real coating inspection criteria from the supplier when corrosion resistance is critical.
A cross-test should place a new galvanized bracket, a scratched galvanized bracket, and a bracket exposed to wet-floor conditions into the same visual inspection routine. The goal is not to prove a universal failure timeline. The goal is to compare the pattern of surface change. New galvanized surfaces should show continuity. Scratched surfaces should be monitored at the exposed line. Wet-floor samples should be checked around fasteners, folds, and lower edges where water can remain longer.
Factory-level control should combine incoming thickness checks, surface appearance review, hole position measurement, folding angle inspection, and sample assembly validation. For the known product family, thickness checks must separate 2.5mm and 4.0mm items. Fit checks must separate 2″ track and 3″ track safe bottom bracket versions. Roller compatibility should confirm the 11mm roller shaft requirement. Surface inspection should reject obvious coating discontinuity, heavy burrs, or sharp edges that could damage cable contact areas or create installation hazards.
A good acceptance document should be written as a risk-control checklist instead of a marketing description. It should define what to measure, where to inspect, and what to compare against the actual door system. For reference, a buyer may use Baoteng garage door hardware resources as a starting point for matching bracket families with the surrounding hardware system, then request product-specific drawings or samples before large-volume purchasing.
Frequently Asked Questions (FAQ)
How to install garage door springs?
Garage door spring installation is dangerous because spring systems store significant mechanical energy. A bottom lift bracket should not be treated as a spring adjustment component. Match the bracket to the track, roller shaft, and cable path first, then have spring work handled by a qualified garage door technician.
How to fix the garage door cable?
A cable problem should be diagnosed through the full lower-corner path. Check whether the cable is rubbing, whether the bottom bracket is bent, whether the fastener holes show directional wear, and whether the 11mm roller shaft and track size match the bracket design.
How much is a new garage door installed?
Installed cost depends on door size, panel type, hardware system, labor, and local service conditions. For bottom bracket decisions, do not focus only on replacement price. A mismatched bracket can create repeated cable wear, roller bias, and service callbacks.
How do I program a universal garage door opener?
Programming a universal opener is an electrical control task, while a bottom lift bracket is mechanical hardware. If the opener struggles, stops, or reverses, inspect the lower corner hardware and track movement before assuming the remote or opener logic is the only problem.
How to program garage door remote to car?
Vehicle remote programming is separate from bracket selection. Still, if the door hesitates during travel after programming works, inspect the bottom bracket, roller shaft, and cable path. Mechanical drag can imitate opener problems even when the remote signal is correct.
 English
  Русский
  日本語
日本語  한국어
한국어  Français
  Deutsch
  العربية
  Português
  Español