
Safe Bottom Bracket Replacement Transformation
Reference Standard: Relevant material and performance testing standards include ASTM B117 salt spray exposure for coated metallic surfaces and general garage door hardware guidance from DASMA technical resources.
Short Answer
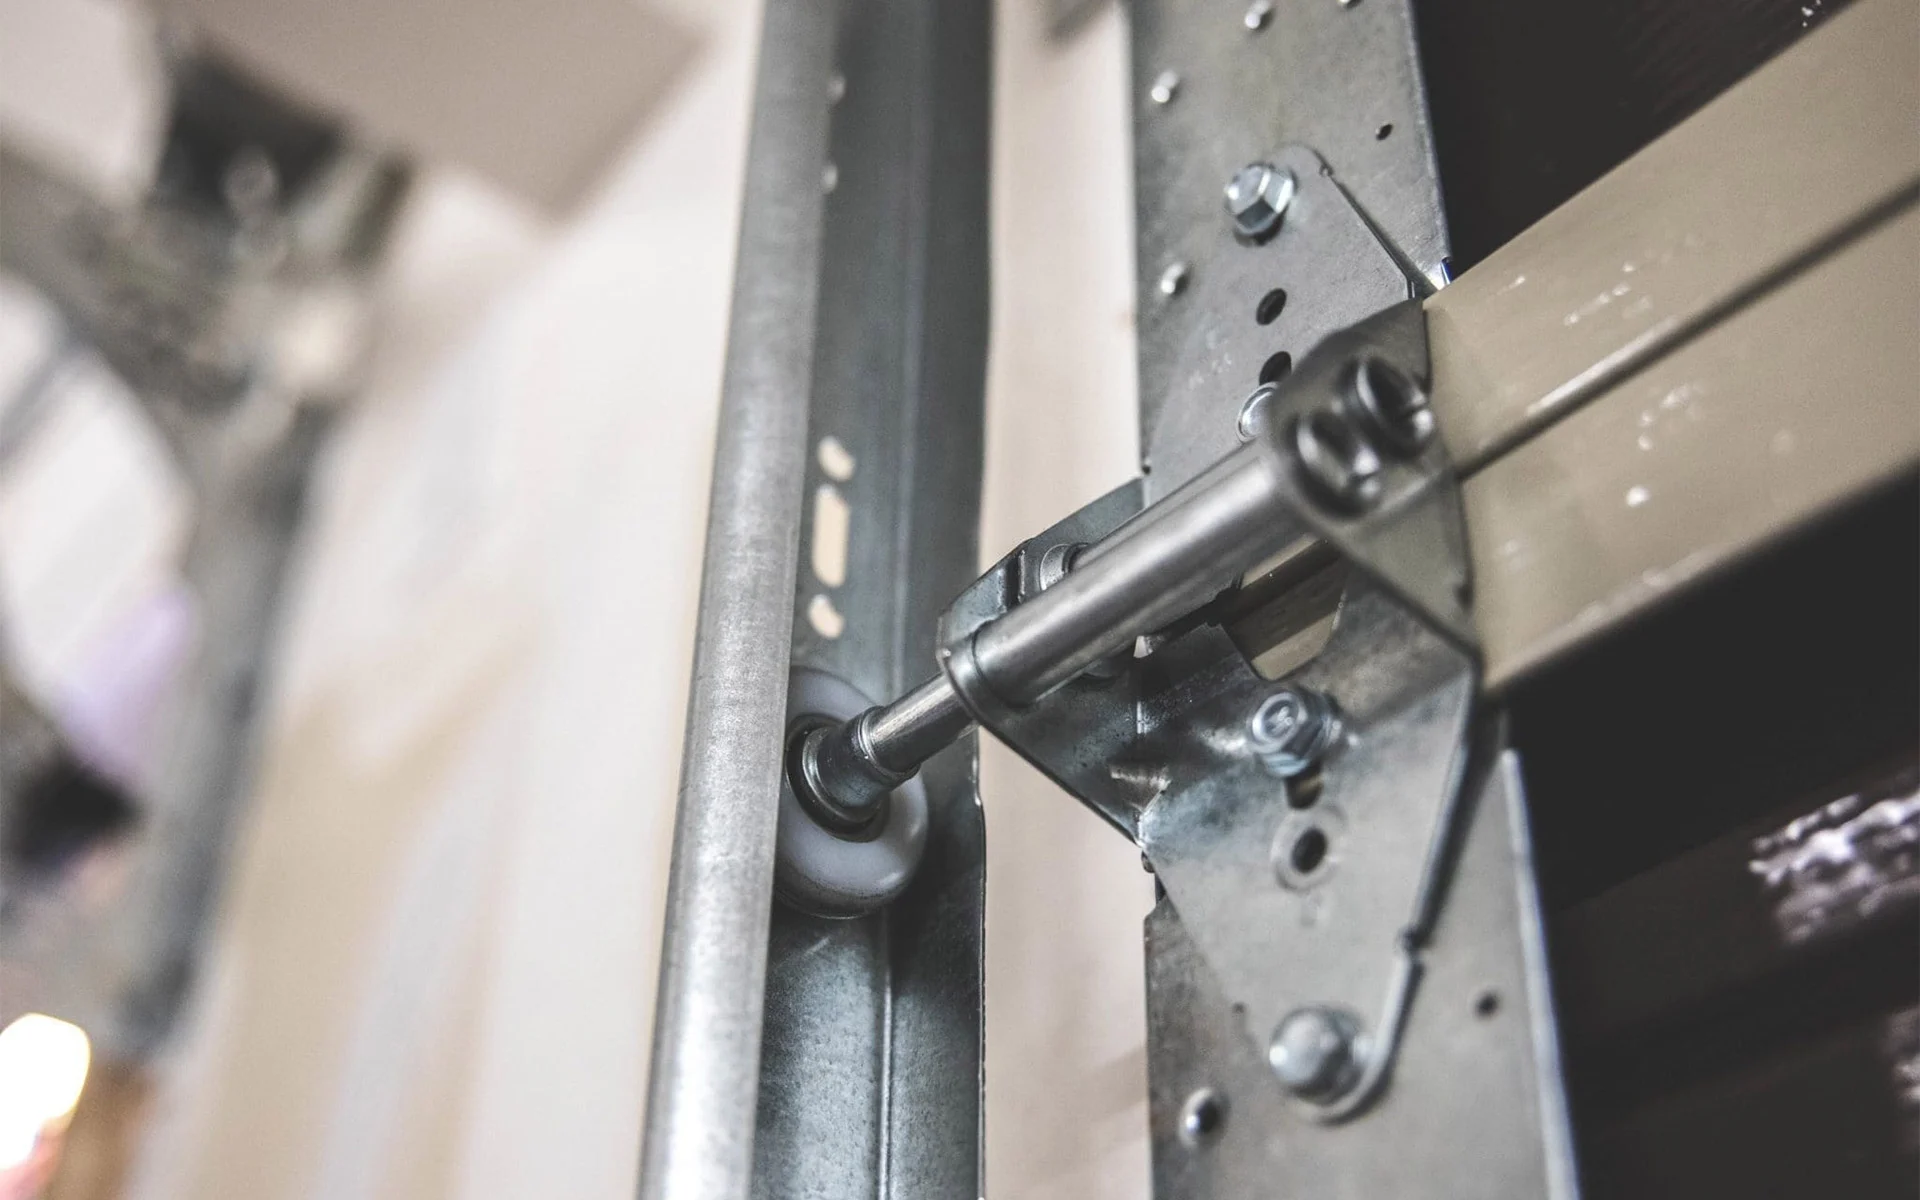
A Safe Bottom Bracket is a bottom-corner hardware component used in garage door and industrial door bracket systems. The catalog data identifies multiple relevant versions: a 2″ Safety Bottom Bracket, unadjustable, for 2″ track with an 11mm roller shaft and galvanized finish; a 2″ Safety Bottom Bracket, adjustable, for 2″ track with an 11mm roller shaft and galvanized finish; a 3″ Safe Bottom Bracket, unadjustable, for 3″ track with an 11mm roller shaft and galvanized finish; a 3″ Safe Bottom Bracket, adjustable, for 3″ track with an 11mm roller shaft and galvanized finish; and a Residential 2″ Safe Bottom Bracket for 2″ track, 11mm roller shaft, and galvanized finish.
The meaningful replacement question is not simply, “Does the new part match the track?” It is whether the new bracket can rebuild a stable lower-corner reference on a panel that may already carry years of screw pressure, bottom-edge compression, and roller movement history.
When Bottom Bracket Replacement Starts From Panel Memory, Not From the New Part
A new Safe Bottom Bracket enters an old system with a memory. The door panel is not a neutral mounting surface after years of operation. The bottom corner has absorbed repeated opening and closing cycles, localized fastening pressure, roller-side load transfer, and small movements between the panel skin, inner reinforcement, fasteners, and track path. Even when the replacement bracket matches a 2″ track or 3″ track, the existing panel may still guide the installation toward the old deformation pattern.
This is where the replacement logic changes. The bracket is galvanized, which gives the steel surface a protective zinc-based finish, but the finish does not correct a distorted mounting plane. The 11mm roller shaft is a dimensional anchor, not a cure for a compressed lower panel edge. If the old panel corner has a shallow inward set caused by long-term tightening, the new bracket may appear flush at the fastener points while remaining slightly unsupported across part of its contact face. That difference can create a bracket that is “installed” but not fully seated.
An edge-case fatigue model helps clarify the issue. Imagine an older sectional door exposed to daily temperature swing, airborne dust, humidity, and repeated bottom-corner vibration. In the early stage, the panel accepts fastener pressure and the bracket remains visually aligned. In the middle stage, the panel surface develops shallow compression rings around fastener points, and the roller path begins to rely more heavily on those old reference marks. In the limit stage, a new bracket follows the damaged geometry instead of restoring a clean plane. The bracket is not necessarily defective; the mounting surface has inherited a shape that competes with the new hardware.

A cross-dimensional comparison also matters. In a clean-panel replacement, the installer can judge the bracket by track fit, roller shaft compatibility, and visible alignment. In an older-panel replacement, the same checks are not enough. The old holes may pull the bracket toward a previous position, the lower edge may no longer be square, and the galvanized surface may contact the panel unevenly. The contrast is not between adjustable and unadjustable hardware as product types. It is between a door corner that provides a reliable reference and a door corner that silently transfers its old geometry into the new part.
Safety Bottom Bracket Garage Door Cycle Trace After Replacement
The first operating cycle after a Safe Bottom Bracket swap should be read as a motion trace, not as a simple pass-or-fail event. The key observation is how the lower door corner behaves when the roller begins to travel under real movement. The 11mm roller shaft is the reference point because it connects the bracket to the roller path, but the inspection should focus on trace behavior rather than treating the shaft as a standalone signal.
A practical first-cycle reading looks at three areas: the lower panel corner, the roller-side path, and the bracket-to-panel contact line. If the bottom corner shifts slightly during the first opening movement, the new bracket may be settling into the old panel memory. If the roller area shows abnormal rub marks after limited movement, the shaft axis may be influenced by a distorted mounting face. If the bracket edge overlaps old pressure marks but leaves a small visible gap at another area, the mounting plane may not be fully restored.
The extreme scenario is a damp garage with daily opening cycles and fine floor dust near the threshold. In the initial phase, the galvanized bracket surface resists general atmospheric exposure, and the door may operate normally. In the mid phase, dust and micro-movement can reveal contact inconsistency through faint abrasion around the roller-side region. In the limit phase, the bracket may still be mechanically attached, yet the movement path becomes less predictable because the bottom corner is no longer giving the roller shaft a stable geometric base.
A comparison test can be described without inventing a laboratory fixture. Case A uses a replacement bracket on a relatively flat lower panel. The bracket sits against the panel with consistent contact, and the roller movement stays visually smooth after the first cycle. Case B uses the same bracket type on an older panel with elongated previous holes and compressed screw marks. The model still matches the known data, such as 2″ track, 3″ track, 11mm roller shaft, and galvanized finish, but the cycle trace may show subtle lower-corner repositioning. This is a geometry problem created by the door history, not a material claim about the new bracket.
KEY TAKEAWAYS
- Old fastener marks can pull a new Safe Bottom Bracket toward a previous distorted position.
- A correct 11mm roller shaft fit does not prove that the lower panel plane is flat.
- Faint rub marks after limited cycling can reveal inherited geometry before obvious failure appears.
Why Replacement Accuracy Can Fail Even When the Bracket Model Looks Correct
A replacement can fail even when the selected bracket appears correct because product identity and installation geometry are different layers of accuracy. Product identity answers whether the part belongs to a 2″ track or 3″ track system, whether the roller shaft reference is 11mm, whether the finish is galvanized, and whether the version is adjustable or unadjustable. Installation geometry asks whether the old door corner can still support that part in the intended plane.
The root cause is load path translation. A bottom bracket does not merely occupy space; it transfers motion and reaction forces between the lower panel corner and the roller path. When the mounting surface is flat and the hole positions are sound, the force path remains more predictable. When previous fastener holes have stretched, the lower panel edge has compressed, or the corner has shifted laterally, the same bracket may be pulled into a biased position during tightening. That bias can alter the roller axis even though the part number and track family are correct.
From a material standpoint, galvanized steel helps resist normal environmental exposure by using zinc as a sacrificial protective layer. That protection is valuable in a bottom-door environment where humidity, condensation, and floor-level contamination can be present. Yet the zinc finish is a surface protection system, not a geometric correction system. It can slow the exposure response of steel surfaces, but it cannot compensate for a door panel that has lost flatness around the mounting zone.
A pressure timeline shows how this develops. During the early period of an older door’s life, fastener pressure forms shallow local impressions. During the middle period, repeated cycles can turn those impressions into preferred seating zones. During the replacement period, the new bracket may settle into those zones, making the installer believe the part has seated naturally. During the risk period, the roller path may begin to reflect the old panel bias through uneven motion, slight contact noise, or visible rubbing.
| Replacement Variable | Clean Panel Expectation | Older Panel Risk | Practical Check |
|---|---|---|---|
| 2″ track bracket fit | Bracket aligns with intended track family | Old holes may bias the bracket position | Confirm panel surface before tightening |
| 3″ track bracket fit | Larger track family is matched by the correct bracket type | Corner distortion can still offset shaft path | Compare bracket contact line across the panel |
| 11mm roller shaft | Shaft enters the intended bracket interface | Shaft may sit correctly but travel off-axis | Observe first-cycle movement trace |
| Galvanized finish | Surface resists ordinary moisture exposure | Finish cannot correct poor seating geometry | Separate surface condition from plane stability |
| Adjustable version | Provides field positioning room | Adjustment may mask panel distortion | Confirm final locked position after movement |
| Unadjustable version | Fixed geometry supports repeatability | Old panel memory may force misalignment | Avoid relying only on old screw marks |
A secondary system risk is often overlooked: the opener and spring system may be blamed for a symptom that begins at the lower hardware. A lower-corner bracket that is slightly biased can make the door feel uneven during travel. The visible symptom may appear as rubbing, hesitation, or corner movement, while the underlying cause is a bracket plane inherited from the old panel. This is why replacement accuracy should include both part verification and door-corner condition review.
Factory-Side Notes Buyers Should Request Before Replacing Safe Bottom Brackets on Older Doors
A buyer requesting Safe Bottom Brackets for older sectional doors should not send only a simple product name. The inquiry should state the required track family, the 11mm roller shaft requirement, whether the bracket should be adjustable or unadjustable, the galvanized finish expectation, and whether the application is new installation or replacement on older panels. That last detail changes the risk conversation because older panels introduce geometry uncertainty.
Execution Protocol 1: Confirm the replacement context before confirming the bracket. The buyer should identify whether the door uses 2″ track or 3″ track, whether the lower hardware requires an adjustable or unadjustable Safe Bottom Bracket, and whether the roller shaft reference is 11mm. The supplier-side confirmation should keep these fields visible in quotation, packing, and product communication. The expected material behavior is not a new strength value; it is a reduction in mismatch risk because the bracket is selected around the actual system interface. The hidden cost is slower inquiry processing, but the benefit is fewer replacement errors caused by ambiguous naming.
Execution Protocol 2: Ask for dimensional inspection logic, not only product photos. A reasonable factory-side process should include checks of hole position, formed angle, track compatibility, roller-shaft interface, and visual galvanized surface condition. The material expectation is a more consistent contact surface and a more repeatable roller-axis relationship. The risk is overclaiming precision without published tolerances, so the communication should avoid invented figures and stay tied to observable checks.
Execution Protocol 3: Separate galvanized finish review from installation geometry review. Galvanizing supports corrosion resistance under ordinary humidity and condensation exposure, but a clean finish does not prove the bracket will sit correctly on an old panel. The expected performance improvement is better decision clarity: surface review covers coating condition, while geometry review covers seating behavior. The hidden cost is that buyers may need to provide photos of the old panel corner, but that evidence can prevent the wrong conclusion.
Execution Protocol 4: Build a replacement inquiry checklist for older doors. Buyers should include track size, shaft diameter, bracket version, door age condition, old hole condition, and lower-panel deformation notes. This does not replace engineering inspection on site, but it gives the supplier enough context to avoid treating every Safe Bottom Bracket order as a new-door installation. For additional product browsing and company context, buyers can review garage door hardware and bracket supply information.
PRO-TIP / CHECKLIST
- Confirm whether the application uses 2″ track or 3″ track before asking for pricing.
- State the 11mm roller shaft requirement in the inquiry rather than assuming it from the product name.
- Identify whether the replacement needs an adjustable or unadjustable Safe Bottom Bracket.
- Inspect old panel holes for elongation, compression marks, or pulled edges before installation.
- Check whether the galvanized bracket surface is clean, continuous, and free from severe handling damage.
- Observe the first door movement after replacement and compare the bracket contact line against old marks.
- Do not treat a correct bracket model as proof that the old lower panel corner is still flat.
- Keep replacement photos and part confirmation together for future maintenance records.
Frequently Asked Questions (FAQ)
How do you reprogram a garage door opener after hardware replacement?
Bracket replacement normally does not require opener reprogramming. Reprogramming is usually related to remote controls, keypads, or opener memory. After replacing a Safe Bottom Bracket, first confirm the door moves smoothly by hand before changing opener settings.
How do you open a garage door manually when checking a Safe Bottom Bracket?
Disconnect the opener using the manual release only when the door is closed and stable. Lift the door carefully and watch the lower corners. If one side drags, shifts, or rubs near the track, inspect the bracket seating and roller path before reconnecting the opener.
How do you program a clicker garage door remote?
A clicker remote is programmed through the opener’s learn button or its brand-specific procedure. This is separate from Safe Bottom Bracket selection. If the door binds after bracket replacement, solve the mechanical movement issue before assuming the remote or opener is at fault.
How do you reset a Genie garage door keypad?
A Genie keypad reset depends on the opener model and keypad generation. Follow the manufacturer’s official instructions. If the keypad works but the door movement is uneven, the issue may be mechanical, such as lower bracket seating, roller path friction, or old panel distortion.
 English
  Русский
  日本語
日本語  한국어
한국어  Français
  Deutsch
  العربية
  Português
  Español