
Top Roller Bracket Geometry Testing Guide
Reference Standard: Relevant material and performance testing standards, including ASTM A653/A653M for zinc-coated sheet steel when applicable and ISO 9227 neutral salt spray testing for corrosion exposure evaluation.
Short Answer
Top Roller Bracket for Garage Door Entry Angle Analysis
The top roller bracket controls the starting relationship between the upper door panel and the track curve. In practical terms, it decides how the top roller enters the curved or vertical track zone when the door begins to close or lift. A bracket that looks mechanically simple can still change the door’s motion because its hole location, bend geometry, bracket width, and installed stiffness influence the roller’s first contact path.
The catalog data gives several real bracket groups rather than one universal bracket. The BT-B204 Residential Top Bracket is listed with 1.5mm thickness and a galvanized finish. Industrial versions move into a heavier range: BT-B201 Industrial Top Bracket is listed at 2.5mm thickness, 150mm width, and galvanized finish. The mute industrial versions also show clear dimensional differentiation: BT-B202 Industrial Mute Top Bracket is 2.5mm thick and 130mm wide, while BT-B203 Industrial Mute Top Bracket is 2.5mm thick and 120mm wide. These figures matter because top bracket stiffness is not only a strength issue; it affects how consistently the roller axis holds its position under door-panel movement.
A useful edge-case model is a top panel that is slightly proud at the closing line. In the first closing cycle, the roller may still enter the track without complaint. After repeated operation, the bracket is exposed to bending load from the door panel, local shear at the roller shaft, and contact feedback from the track. If the bracket has less section stiffness, the roller can begin to present itself to the track at a slightly different angle. This does not need to be dramatic. A fraction of angular shift can change the perceived closing force, especially near the final sealing movement.
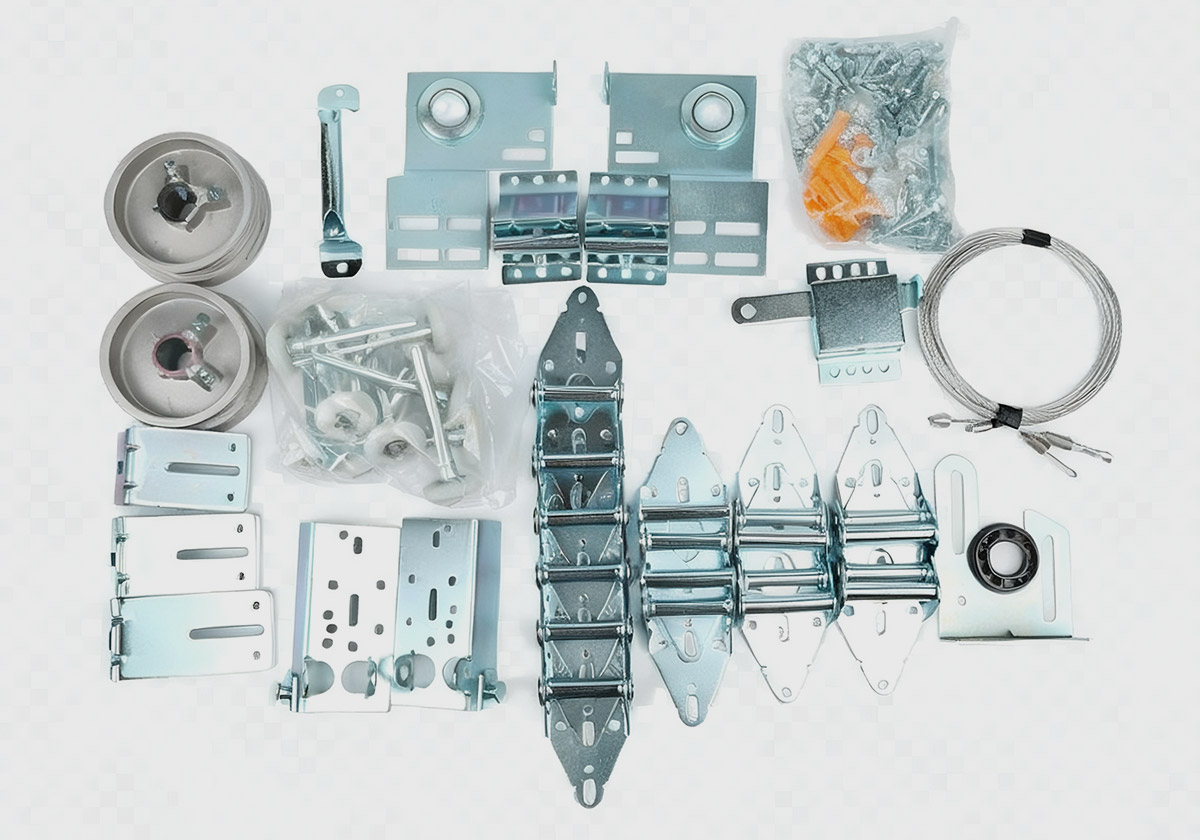
A cross-dimensional comparison test can be built without inventing material grades. Take a residential top bracket at 1.5mm thickness and compare it with an industrial top bracket at 2.5mm thickness under the same top-panel closing geometry. The test does not claim a specific steel grade, because the catalog does not provide one. It only compares physical geometry. The thicker industrial bracket should generally resist angular drift more effectively because bending stiffness rises sharply with section thickness, while the residential bracket may be more sensitive to mounting surface irregularity, panel vibration, and roller shaft offset. That difference can explain why two doors with similar tracks can feel different at the top panel even before a bracket visibly fails.
The practical takeaway is simple: top bracket selection should not begin with “will it hold the roller?” but with “will it maintain the correct roller-entry geometry throughout repeated door movement?” That framing avoids the common mistake of treating the bracket as a passive plate.
The First 30 Millimeters of Travel
The first short movement of a garage door often reveals more than a full-speed cycle. During the first 30 millimeters of travel, the door has not yet reached steady motion. The roller is still negotiating the initial track path, the top panel is still settling into or away from the header area, and the bracket is receiving a combined load from panel weight, shaft reaction, and track contact. If the bracket position is slightly offset, this early phase can produce subtle clues: a delayed lift feel, a small click near the top roller, a top panel that pulls inward unevenly, or a closing line that needs extra opener force.
The catalog thickness range gives a useful testing ladder: 1.5mm, 2.0mm, 2.3mm, and 2.5mm top bracket options are present across the bracket series. A diagnostic test can compare these as geometry holders rather than as simple “light” and “heavy” parts. Under a repeated start-stop model, the early phase can be divided into three stages. In the initial stage, the bracket preserves the original roller path and the door starts smoothly. In the middle stage, small shifts in contact sound appear as the roller enters the track with slightly altered alignment. In the limit stage, the door may still open and close, but the top-panel feel becomes inconsistent because the bracket is no longer holding the same shaft posture every cycle.
A cross-test case helps: install a 2.0mm or 2.3mm top bracket on a moderate-duty panel, then compare it with a 2.5mm industrial bracket under repeated short-cycle movement. The comparison should focus on the first motion impulse rather than final travel speed. The thicker or wider bracket does not automatically make every installation better, but it may reduce sensitivity to panel vibration and shaft loading. A thinner bracket may still perform well on a lighter residential door if the panel alignment is correct and the opener force is properly calibrated.
KEY TAKEAWAYS
- A soft click at the top roller during the first movement can signal entry-angle mismatch before visible bracket damage.
- A top panel that hesitates before following the track may indicate bracket offset or roller-axis drift.
- Repeated closing force changes can appear before corrosion, hole elongation, or obvious edge deformation.
A practical inspection method is to watch the top roller while operating the door manually for a short distance. If the roller pulls hard against one side of the track at the start, the issue may not be the opener itself. The bracket may be setting the roller into the track at the wrong approach line. This is why early travel diagnostics should be included before replacing unrelated components.
Residential vs Industrial Top Brackets Under the Same Track Curve
A residential and an industrial door may share a similar track curve in appearance, but the bracket does not experience the same operating condition. The residential bracket listed at 1.5mm thickness is suitable for a lighter-duty context when geometry, panel fit, and installation conditions remain controlled. Industrial top brackets listed at 2.5mm thickness and widths such as 120mm, 130mm, and 150mm suggest a stronger geometry-support role for heavier or more frequent operation. The important issue is not only load capacity; it is geometry-load matching.
| Bracket category | Catalog data point | Geometry risk to watch | Inspection focus |
|---|---|---|---|
| Residential top bracket | 1.5mm thickness | Higher sensitivity to panel misalignment | Roller entry angle and screw-seat stability |
| General top bracket | 2.0mm or 2.3mm thickness | Moderate offset tolerance | Hole position, bend angle, roller shaft fit |
| Industrial top bracket | 2.5mm thickness, up to 150mm width | Lower angular drift under heavier motion | Width support and panel contact area |
| Industrial mute top bracket | 2.5mm thickness, 120mm or 130mm width | Noise-related early feedback | Contact sound and start-stop smoothness |
| Top bracket support | 2.0mm thickness | Secondary stabilization role | Support alignment and fastening surface |
An edge-case model is a residential bracket placed on a door that gradually receives heavier operational demand, such as more daily cycles or a slightly unbalanced panel. The first stage may show no visible issue. The middle stage may show inconsistent top-panel closure because the bracket is asked to hold a roller path beyond the intended stiffness range. The limit stage may produce hole wear, edge flexing, or uneven roller pressure. This model does not require assuming a hidden material grade. It comes from the known difference between 1.5mm and 2.5mm sections and the mechanical reality of repeated bending and shaft loading.
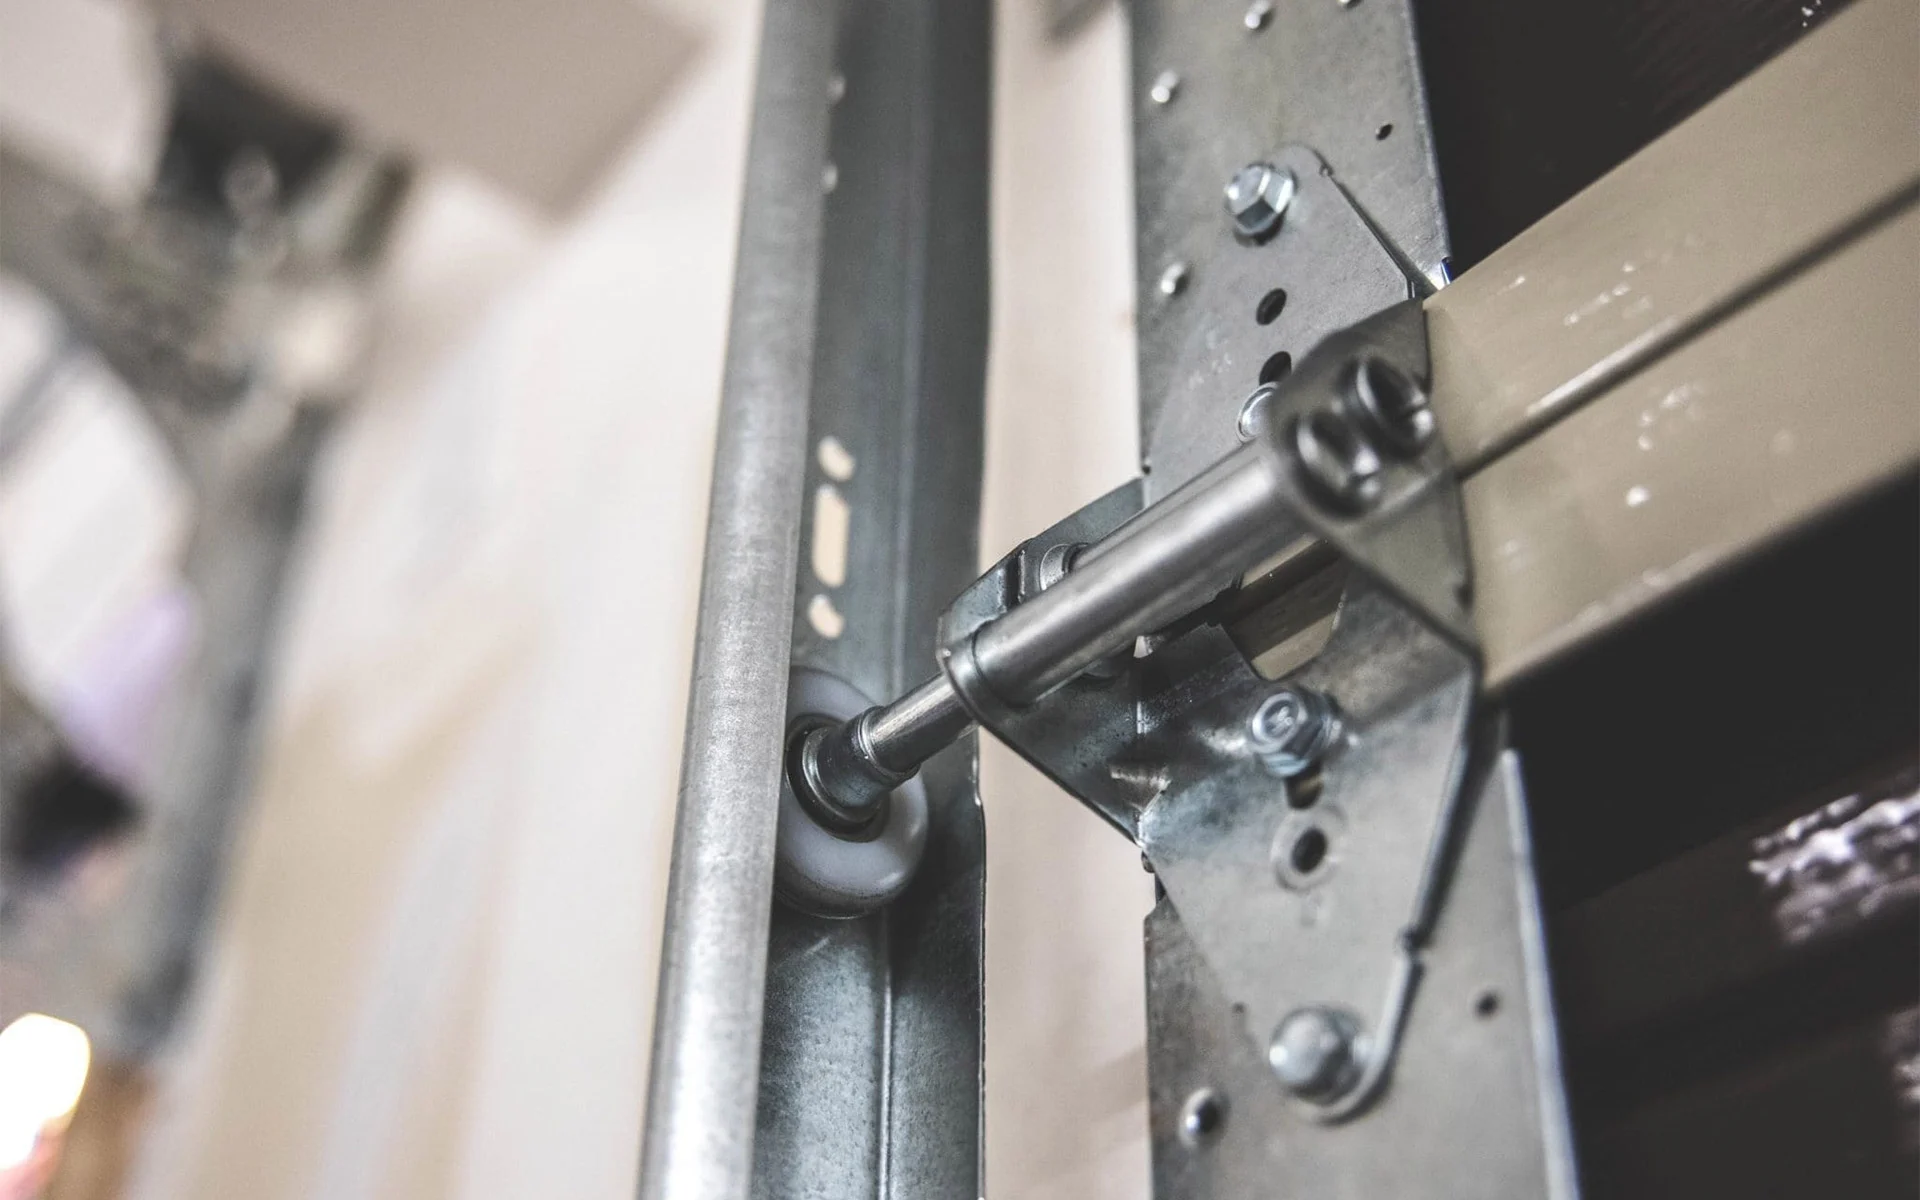
A cross-dimensional test can use the same track curve, the same roller diameter, and the same top-panel closing position, then compare how the top roller behaves with a residential bracket and an industrial bracket. The measurement should look at roller centering, closing-line consistency, and noise during the first travel phase. If the industrial bracket keeps a more repeatable roller posture, the value is not just “more metal.” The value is a more stable relationship between track curve and panel motion.
This section also sets a boundary for accurate writing: the catalog states galvanized finish, not stainless steel, not a specific carbon steel grade, and not a heat-treatment process. Any buying guide or engineering article should keep that boundary. The correct comparison is dimensional and functional: thickness, width, finish, and application label.
Mute Top Bracket Noise Signal Framework
Noise should not be treated only as an annoyance. In a top bracket system, noise can be an early signal that the roller is no longer entering or following the track cleanly. The catalog includes mute-related top bracket entries, including BT-B202 Industrial Mute Top Bracket, BT-B203 Industrial Mute Top Bracket, and BT-B206 Mute Top Bracket. These product names support a noise-focused discussion, but they do not justify inventing rubber inserts, special bearings, dampers, or patented acoustic materials. The safe interpretation is that mute-style bracket selection is relevant where movement sound and roller path smoothness matter.
A fatigue timeline for noise behavior can be described in three stages. In the initial stage, the roller enters the track with a clean line and the bracket holds its shaft posture. In the middle stage, a small intermittent sound appears when the top panel transitions into the track. This may be a result of contact-path change, not necessarily a failed part. In the limit stage, the noise becomes repeatable and may align with visible top-panel movement or bracket flex. At that point, the sound has become a pre-failure signal, not just a comfort issue.
A cross-test case can compare BT-B206 Mute Top Bracket with a general top bracket in the 2.0mm to 2.5mm range. The test should record sound location, first-motion feel, and top-panel seating. It should not claim a decibel value unless measured. The main idea is that mute-style selection can help a buyer focus on movement quality and early signal detection, especially when the door is used in an environment where vibration, closing feel, and occupant comfort matter.
For sourcing and specification review, buyers can begin from the supplier’s garage door hardware product context and then verify the exact bracket drawing, thickness, width, finish, and compatible roller position before ordering. The purchase risk is not only choosing a bracket that fits the door; it is choosing one that keeps the door’s top geometry stable across real operating cycles.
Solutions and Standards for Top Bracket Validation
A strong validation plan should combine selection, inspection, installation fit, and lifecycle observation.
Solution 1: Match bracket thickness to door duty and top-panel behavior.
Execution Protocol: Start with the intended door type and operating frequency. A residential top bracket at 1.5mm should be evaluated for lighter door panels and controlled alignment. Industrial or high-frequency doors should be reviewed against 2.5mm bracket options, especially where widths such as 120mm, 130mm, and 150mm provide broader support.
Expected material behavior: A thicker section generally improves resistance to angular drift and localized bending under roller-shaft load. This does not make it universally superior, but it reduces sensitivity to repeated movement where the top panel is heavier or less forgiving.
Hidden cost control: Overspecifying a bracket can create fit conflicts with existing door geometry. Always confirm hole pattern, bend angle, roller clearance, and panel contact before replacing a thinner part with a heavier one.
Solution 2: Inspect hole geometry and shaft fit before judging opener force.
Execution Protocol: Before changing opener settings, inspect the roller shaft fit, hole roundness, bracket seating, and top-panel contact. Operate the door manually through a short movement range and observe whether the roller loads one side of the track.
Expected material behavior: When the shaft is properly seated and the bracket face sits flat, the roller path becomes more repeatable. This reduces secondary friction and helps separate bracket issues from opener calibration issues.
Hidden cost control: Overcorrecting the opener can mask a bracket geometry problem. The door may move temporarily, but the bracket and roller continue to receive uneven load.
Solution 3: Use galvanized finish inspection as a boundary check, not the main article angle.
Execution Protocol: Check the galvanized surface for coating breaks, edge damage, white corrosion, or exposed areas around holes and bends. Use salt-spray or humidity exposure testing only when the purchasing specification requires it.
Expected material behavior: A continuous galvanized surface helps protect exposed metal in damp garage conditions. Damaged edges or scratched bend zones may become early corrosion locations.
Hidden cost control: Do not treat surface finish as a substitute for geometry. A clean galvanized bracket can still perform poorly if the roller entry angle is wrong.
Solution 4: Build a short-cycle movement acceptance test.
Execution Protocol: After installation, run several controlled partial movements rather than only full open-close cycles. Watch the first travel zone, listen at the top roller, and confirm that the top panel enters the track consistently.
Expected material behavior: A stable bracket should maintain the same roller posture across repeated short movements. The door should not require changing force settings to compensate for top-panel irregularity.
Hidden cost control: Short-cycle tests require time, but they prevent replacing unrelated parts such as remotes, opener boards, or rollers when the root issue is bracket geometry.
PRO-TIP / CHECKLIST
- Confirm the bracket thickness before matching it to residential or industrial use.
- Verify width where the catalog provides it, especially 120mm, 130mm, and 150mm industrial options.
- Inspect hole roundness and roller shaft seating before adjusting opener force.
- Check galvanized finish at bends, punched holes, and cut edges.
- Watch the first short movement of the door instead of relying only on full-cycle operation.
- Compare mute bracket options only within the limits of documented catalog data.
- Avoid claiming steel grade, heat treatment, or damping material unless the drawing or datasheet states it.
Frequently Asked Questions (FAQ)
How do you close a garage door manually?
Disconnect the opener using the emergency release, then guide the door slowly by hand while keeping the path clear. If the top panel binds near the track, do not force it. Check the top roller bracket, roller position, and track alignment before repeated manual operation.
How long does it take to install a garage door?
A full garage door installation commonly takes several hours, depending on door size, spring setup, track condition, and hardware fit. Top roller bracket alignment should not be rushed because small errors at the top panel can change closing feel and opener force behavior.
Why does my garage door open on its own?
Common causes include remote interference, wall-button faults, opener logic issues, or limit-setting problems. A top bracket does not usually trigger automatic opening by itself, but poor top-panel movement can confuse force response on some opener systems and should be inspected.
How do you change a garage door remote battery?
Open the remote casing, remove the old battery, match the battery type, and install the replacement with the correct polarity. If the door still behaves inconsistently, the issue may not be the remote. Inspect door movement, including top roller bracket alignment and track entry.
What is the role of a garage door top bracket?
The top bracket holds the upper roller in position and helps define how the top panel enters the track. It is both a mounting part and a geometry-control component. Thickness, width, finish, and bracket style affect how consistently it performs under repeated movement.
 English
  Русский
  日本語
日本語  한국어
한국어  Français
  Deutsch
  العربية
  Português
  Español