
Garage Door Track Jamb Bracket Checklist
Reference Standard: Relevant material and performance testing standards include ASTM A90/A90M for zinc coating weight on coated iron and steel articles and general dimensional inspection logic for fabricated metal brackets.
Short Answer
Garage Door Track Jamb Bracket Interface Checklist: From Wall Contact to Track Holding
A track jamb bracket is a small part, but it works at a critical interface: the point where the garage door side track is restrained against the jamb, frame, or wall-side fixing surface. The BT-A306 Jamb Bracket is recorded as a 2.0mm galvanized steel component with 90mm, 110mm, 120mm, and 130mm length options. Those numbers matter because the bracket is not judged only by whether it looks strong in a catalog. It is judged by how cleanly it transfers fastening force from the track side into the fixed building-side surface.
The first checkpoint is surface contact. A bracket may have correct material and finish, yet still perform poorly if the installed face does not sit evenly against the mounting surface. When the wall-side contact is uneven, fastening pressure concentrates around a small area instead of spreading across the bracket plane. This can create local bending stress, especially near holes, edges, or bends. In a 2.0mm steel bracket, bending stiffness is strongly influenced by geometry and contact width. The material may be suitable, but poor seating can convert a normal fastening load into a localized prying action.
The second checkpoint is track holding geometry. A garage door side track experiences repeated movement nearby as the door cycles. The bracket itself does not need to carry the entire moving door load, but it helps keep the track positioned so the moving system remains guided. If the bracket is too short for the real mounting offset, the installer may be tempted to force alignment. If it is too long for the available fixing zone, the bracket may sit at an awkward angle or leave unused projection. That is why the length range of 90/110/120/130mm should be treated as an installation-planning detail, not a minor catalog variation.
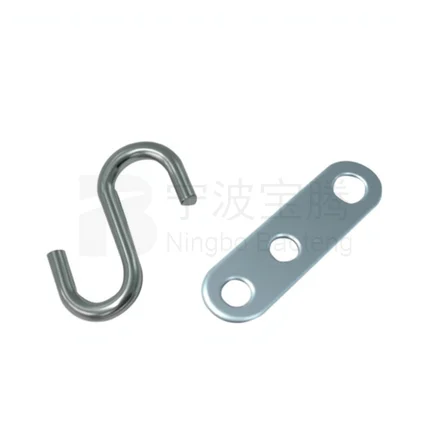
A useful edge-case model is the narrow contact strip scenario. Imagine a side track that appears visually vertical, but the wall contact area behind the bracket has a raised strip, paint buildup, or uneven frame surface. During early service, the bracket may seem secure. In the middle stage, repeated vibration can make the fastening pressure settle unevenly. In the extreme stage, one edge of the bracket may begin carrying more load than the opposite edge. This does not prove the bracket material is defective; it shows why interface inspection should happen before the first cycle.
A cross-dimensional comparison makes this clearer. In a visual-only check, two brackets can look identical after installation. In an interface-based check, one bracket is fully seated with even contact, while the other bridges across a surface gap. The first installation spreads force through the bracket body. The second installation turns the bracket into a lever. For procurement teams, installers, and distributors, the better question is not simply “Is it galvanized?” but “Can this 2.0mm galvanized steel bracket sit flat and hold the track line without forced correction?”
KEY TAKEAWAYS
- Check whether the bracket face sits flat before tightening fasteners.
- Confirm the selected length matches the actual track-to-jamb offset.
- Inspect hole alignment and edge condition before judging installed track stability.
The Four-Length Checklist: 90mm, 110mm, 120mm, and 130mm Before Installation
The BT-A306 Jamb Bracket gives buyers four length choices: 90mm, 110mm, 120mm, and 130mm. These options should not be presented as a vague assortment. They represent a pre-installation decision point. The correct length depends on the distance between the track position and the mounting surface, the available fixing zone, and the installer’s need to avoid forcing the track into position.
A shorter bracket can be useful when the track is close to the jamb surface and the fastening zone is compact. A longer bracket may be needed when the track sits farther from the fixing surface. The important point is that the catalog data does not provide hole spacing, load rating, screw specification, door size, or certification data for this bracket. A responsible checklist must stay inside the verified specification: 2.0mm thickness, galvanized steel finish, and the four length options. Anything beyond that should be treated as installation logic, not documented product performance.
A practical pre-order checklist should ask three questions. First, what is the real offset from the side track to the fixing surface? Second, is the wall or jamb surface flat enough to support bracket contact? Third, does the selected bracket length allow the track to be fixed without pulling the bracket into twist? These questions are more useful than choosing length by habit.
A realistic stress model is the offset mismatch model. At the initial stage, a slightly mismatched length may still allow the installer to fasten the bracket. The track looks aligned because the fasteners pull the system into place. At the middle stage, small movement near the track can reveal that the bracket was installed under residual stress. At the extreme stage, the bracket may not fail dramatically, but the track fixing point may lose repeatability after re-tightening. In this model, the root issue is not corrosion or raw thickness alone. It is the mismatch between bracket length and mounting geometry.
A cross-test case can compare two purchasing workflows. In Workflow A, the buyer orders one length because it is commonly used. The installer adapts on site. In Workflow B, the buyer checks the track offset, fixing surface, and available mounting space before choosing among 90mm, 110mm, 120mm, and 130mm. Workflow B reduces the chance that installers will use fastening force to compensate for geometry mismatch. It also makes replacement orders more consistent across multiple doors or projects.
| Selection Checkpoint | Verified Product Boundary | Risk if Ignored | Practical Buyer Action |
|---|---|---|---|
| Bracket thickness | 2.0mm | Lower bending resistance if replaced with thinner unknown parts | Verify thickness during incoming inspection |
| Length option | 90mm | May be too short for larger offset | Match to measured track-to-jamb distance |
| Length option | 110mm or 120mm | May be selected by habit rather than fit | Compare with available fixing zone |
| Length option | 130mm | May project too far in compact spaces | Confirm clearance before ordering |
| Surface finish | Galvanized steel | Coating damage can expose steel substrate | Inspect for visible peeling, rust, or scratches |
Galvanized Steel Under Fastener Pressure: Stocking and Incoming Inspection Checklist
For a stocked garage door hardware part, the inspection question is not only whether the part is present in the carton. A 2.0mm galvanized steel jamb bracket should be checked for thickness consistency, visible coating condition, burrs, deformation, hole position consistency, flatness, and bend quality. The available catalog data does not provide a dedicated QC process for BT-A306, so the following should be treated as a practical procurement inspection checklist for this type of fabricated metal bracket.
The material logic starts with steel and zinc. Steel provides structural stiffness, while the galvanized finish creates a protective surface barrier. If that barrier is scratched, cracked at an edge, or damaged around a hole, moisture and oxygen can reach the steel substrate. In moderate indoor garage environments, this does not instantly destroy the bracket, but it can begin localized oxidation. Edge areas deserve special attention because cutting, punching, and bending operations can leave exposed or stressed surfaces if process control is weak.
The fastener-pressure model adds another layer. When a fastener clamps the bracket against the wall-side surface, pressure does not distribute evenly unless the bracket is flat and the contact surface is stable. A small burr around a hole can prevent proper seating. A warped bracket can create a high-pressure point on one side and a gap on the other. A visually acceptable galvanized surface may still be paired with poor fit if punching or bending accuracy is not controlled.
A useful extreme scenario is the warehouse-to-wall transition model. At the initial stage, brackets arrive with acceptable appearance. At the middle stage, a few pieces show slight edge burrs, surface scratches, or uneven planes after handling. At the installation stage, these minor defects become fit problems because fasteners magnify contact irregularities. The bracket may still be made from 2.0mm galvanized steel, but the usable installation quality depends on whether the part remains flat, clean, and dimensionally consistent.
A cross-dimensional comparison is useful for purchasing teams. A price-only inspection may accept any bracket that resembles the drawing or catalog image. A function-based incoming inspection checks whether the part can be installed without corrective bending, excessive filing, or visual sorting by the installer. The second method reduces hidden labor cost. It also gives distributors a more defensible way to communicate quality expectations with suppliers of garage door hardware components.
PRO-TIP / CHECKLIST
- Verify the bracket thickness against the 2.0mm specification.
- Confirm available lengths are 90mm, 110mm, 120mm, and 130mm when multiple fixing positions are required.
- Inspect galvanized surfaces for rust, peeling, deep scratches, or coating damage.
- Check punched holes for burrs, tearing, distortion, or inconsistent position.
- Place samples on a flat surface to detect rocking or uneven planes.
- Review bend areas for cracking, twisting, or coating stress marks.
- Test sample fit against the intended track fixing position before bulk installation.
- Separate damaged pieces before they reach installers.
Reverse-Diagnosis Checklist: When the Track Looks Aligned but the Bracket Is Not
A garage door side track can look aligned even when a jamb bracket is not seated correctly. This is the reason reverse diagnosis matters. Instead of beginning with the assumption that the bracket is loose, defective, or corroded, the inspection starts with field symptoms and works backward toward the bracket interface.
One symptom is a localized gap between the bracket and the wall-side surface. Another is a fastener that tightens normally but does not restore stable contact. A third is a track that appears straight from a distance but shows small movement at one fixing point when nearby components are moved. These observations should not be treated as proof that the BT-A306 specification is wrong. They are installation and fit signals that should be checked within the known boundary of 2.0mm galvanized steel and 90/110/120/130mm length options.
The mechanism is mechanical, not mysterious. When a bracket is forced into alignment, it may store residual stress. Over repeated movement near the track, that stored stress can relax through slight contact shift, surface compression, or fastener settling. If the bracket length does not suit the offset, the installer may unknowingly create a small lever arm. If the mounting surface is not flat, tightening can bend the bracket plane rather than secure it evenly.
An edge fatigue timeline helps explain the inspection sequence. In the early phase, the bracket seems stable because the fastener preload masks the mismatch. In the middle phase, dust patterns or slight marks near the contact point may reveal micro-movement. In the extreme phase, repeated re-tightening does not solve the problem because the hidden issue is geometry, not only fastener grip. The part may still be physically intact, but the mounting interface is not working as intended.
A comparison test can be performed without inventing unsupported standards. Take two installed positions using the same bracket specification. One position uses a bracket length selected after measuring the offset. The other uses a length selected without measurement and corrected during installation. After repeated door movement, inspect contact marks, wall-side seating, and visible bracket plane. The measured installation should show more predictable contact. The corrected installation may show uneven pressure marks or a tendency to shift back toward its natural unstressed position.
This reverse-diagnosis approach avoids a common mistake: blaming surface finish before checking geometry. Galvanized steel is relevant because coating damage can expose steel to moisture, but not every unstable track fixing point begins with corrosion. Some begin with length mismatch, poor contact, burr interference, or bracket twist. The correct checklist order is: confirm geometry, check seating, inspect hole and edge condition, then evaluate surface finish.
Frequently Asked Questions (FAQ)
How to lube garage door rollers?
Use a lubricant suitable for garage door rollers and apply it sparingly at the roller bearing area, not on the track surface where buildup can attract dust. While lubricating, inspect nearby track fixing points and jamb brackets for movement, gaps, or visible fastening irregularity.
How do I reset my garage door opener?
Most openers reset through the manufacturer’s control button or power-cycle procedure, but the exact method depends on the opener model. Before blaming the opener, check that the door travels smoothly and that track brackets are not allowing the side track to shift during movement.
How to bypass a garage door sensor?
Bypassing a garage door sensor is not recommended because the sensor is a safety device. If the door will not close, inspect sensor alignment, wiring, obstruction, and door movement. Track instability near jamb brackets can also create movement problems that appear unrelated to the sensor.
What should be checked before ordering a track jamb bracket?
Confirm the required bracket length, the track-to-jamb offset, the mounting surface condition, and the need for galvanized steel. For BT-A306, the verified data points are 2.0mm thickness, 90/110/120/130mm length options, and galvanized steel finish.
Can galvanized steel prevent all bracket corrosion?
No. Galvanized steel improves corrosion resistance by using zinc as a protective barrier, but deep scratches, damaged edges, or poor storage can expose steel. Inspect coating condition before installation, especially around punched holes, bends, and cut edges.
 English
  Русский
  日本語
日本語  한국어
한국어  Français
  Deutsch
  العربية
  Português
  Español